
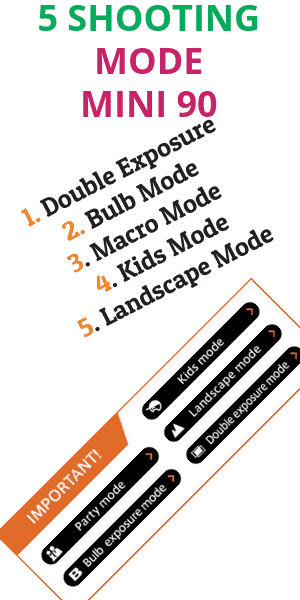
Instax mini 90 Modes
The camera got some great modes here. First of all it’s built to have a very powerful point-and-shoot ability which means that we can pick this camera up and begin just a moment that we put it in our hands. The camera can shot more closer than three meters and the camera is programmed to shoot in specific focus range the moment you turn it on and that is great.
We want to be able to have access to things like double exposure Values. This camera uses a light meter type of evaluation system. we’ve got access more like a very advanced program where we can turn light and dark. So we can lighten up. we also have darken function. The interesting mode is bulb mode where you can grasp the light for picture. Landscape mode comes with more high quality picture output. For fast-moving picture there has Kids or Sports mode. Flash Control system and self timer is one of the fantastic feature of mini 90 camera. To get closer shot there has a mode Macro Mode. So let’s start one by one with more details.
In this article, I have combine all of my written post of Modes like Double Exposure, Bulb, Macro, Kids and Landscape mode. You can get almost all in one or you can go to one by one post to get individual interest.
Another Very Important Shooting Mode is Macro Mode.
1Double Exposure Mode
How to take your first perfect Double Exposure Shots ??
Alright so the basic idea that you need to have in mind is that the first shot you take is going to be your main photo. And the second shot is going to be shadow. Everything in that the shot that is a shadow. that is where you’re going to see whatever you take in your second shot.
- First shot is the main photo
- second shot is going to be the shadow.
The basic shots of double exposure – instax mini 90
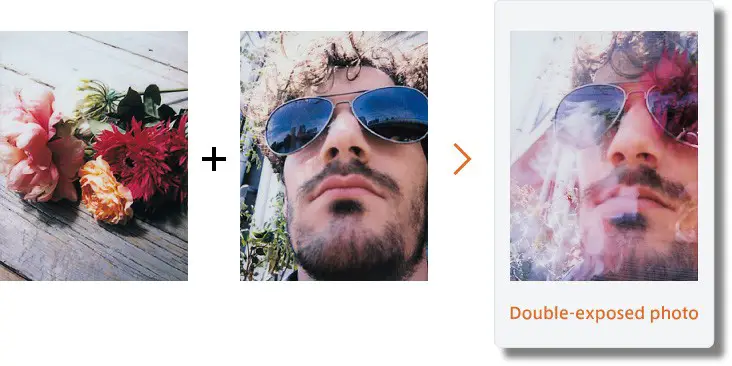
It is basically use first image as blurry and second image as a main photo. In mini 90, double exposure mode is a new feature previous models do not have. You can superimpose or overlap two different images to create a single creative photo. Just release the shutter once for one scene and again for another scene.
Here in the example of a flower and a man, first shot was for flower and second shot was for man. It has created a stylish photo of a man with blurry flowers.
basic double exposure – mini 90
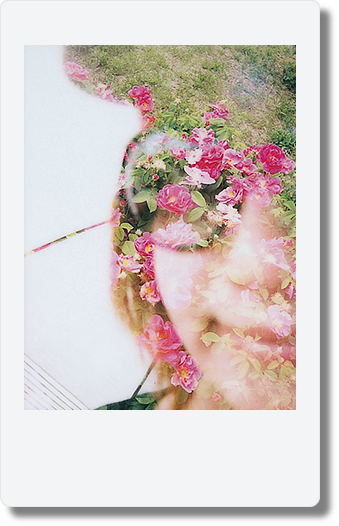
I have got a ton of example of Double exposure shots. Just keep reading this article that is only about variety use of double exposure shots. If you just want simple double exposure- one with blurry and other with main photo, then you can do it very easy way. Just take one shot to use as blurry or background image and other one as a main photo.
How to take a silhouette Double exposure – Instax mini 90
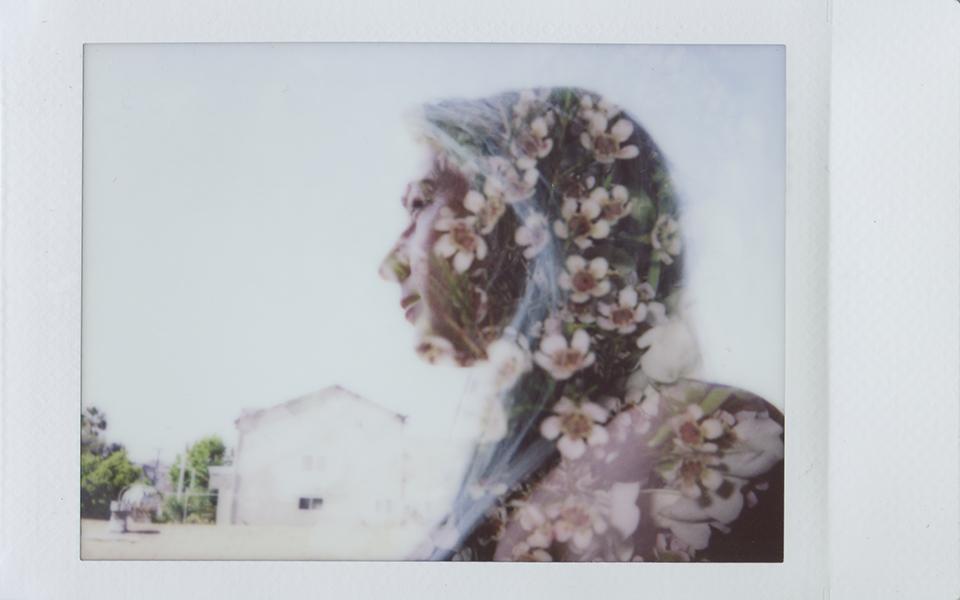
A silhouette is basically a really bright background and a dark subject. That’s the Silhouette basic like another feature of Digital Camera. When you do that the whole first shot is going to be dark shadow. The shadows where your second photo is going to show up.
That’s why this is so cool. so what you need to do for your first shot is take as a silhouette. And that works really well either against a white wall or you have got bright white background or against the bright white sky.
Step One
Okay, so the way you do this. shot number one is a silhouette. you can do it up a person or an object whatever you want. And like we were just talking about because that subject is dark. The shadows that’s where your second photo is going to show up.
but when you shoot against a bright sky it becomes white because there’s so much light. so start with that get that silhouette.
Step Two
Then for your second shot find a pattern or a texture or a color that’s gonna fill in those shadows. And that’s all you do. It’s really simple the results especially with instant film are quite unpredictable but very cool. The result is fantastic and all about your shooting experience or style.
Okay so take a second to let that sink in. the shadows are where that second photo is going to show up. because those highlights, they’re already getting a lot of light when you put more light it just becomes more bright. the stereotypical double exposure shot that everyone does because it looks so red is this one that I’ve been showing you.
Now lets use tow easiest step with Instax mini 90 Neo Classic.
Second example of silhouette is If you don’t use really bright background, it’s going to be like this. It’s also pretty cool. Since it is little bit tricky, you should try it to get more funny experience.
now you can see for example this photo if that first silhouette shot doesn’t have a really bright white background. then you kind of get that blue sky and you get the texture kind of showing up there as well instead of just in the silhouette.
so that’s one little way that you kind of want that really white background. so you get less of the sky and more just that pattern filling in the silhouette.
Tips for Half Image – Mini 90 Double Exposure
One really cool way to do double exposures is by exposing only half of the film at once in your first exposure and then you expose the other half of the film in the other exposure and that’s not as hard as it sounds.
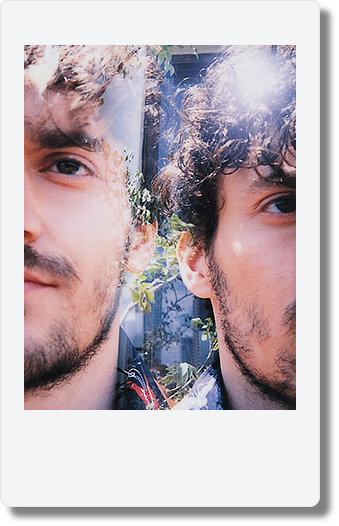
So here’s an example on the top I have no half face on the left and the second half face on the right. The other half on the second shot combined with their first short. And now its look very cool and crazy you hardly have seen images like this In the photography. So this is really fun the way to do it. I’ll tell you first on this camera because it’s very easy.
You could have a person in one half of the frame and then that same person in the other half of the frame. all sorts of crazy stuff like that like this.

Tips for half images with double exposure
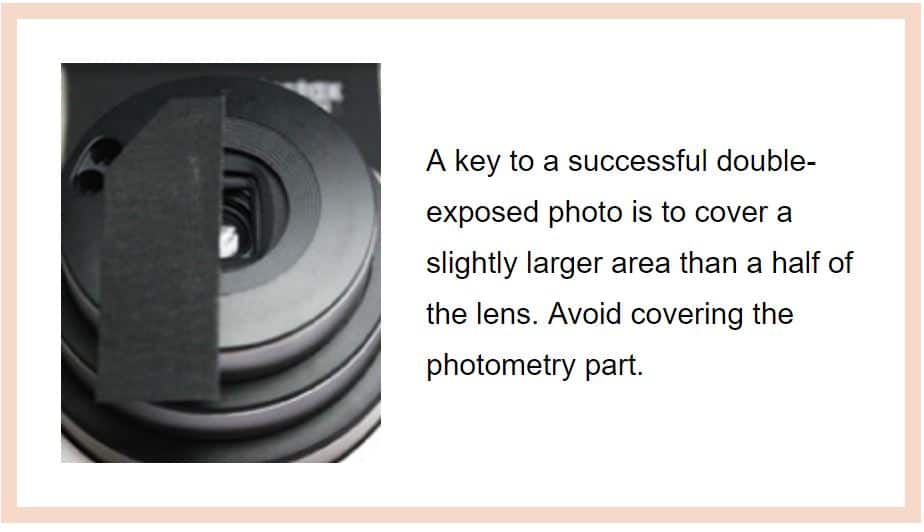
- if you want to do something like that with Instax mini 90 new classic cameras, I don’t know of any fancy gadget like that for it but all you would need to do is take like a piece of black tape and cover up half of the frame for your first shot.
- then carefully move that for that tape to the other half of the frame for the second shot. that’s how you would do it with that.
Covering the Lens mini 90
- okay a couple final tips before we go one thing to remember is that when you are exposing the same piece of film twice. it’s getting basically twice as much light as it normally would.
- so you might want to experiment with underexposing this cameras have the ability to kind of darken the frame a little bit.
- so you might want to try doing that. So that it doesn’t everything doesn’t just get overexposed because it’s being exposed twice or multiple times.
- another tip just kind of in general when you’re starting out with double exposure and multiple exposure photography is that you’re gonna want to look for scenes that are quite simple.
- if you have really really busy scenes and you’re putting two of them together you can just look chaotic.
- so while you’re getting the hang of it you’re gonna want to look for things that are like simple not a lot in the shot and that way when they combine you can still kind of tell what’s going on.
- alright, guys, I hope you enjoyed that little introduction to double exposure photography. remember to look at your manual to figure out how to do it but the biggest thing here is just to experiment. keep those ideas that I’ve given you in mind and have fun with it. because for me this double exposure stuff is always some of the most exciting and unexpected with instant film and I just love that.
Tips for Taking Sideways Picture – Double Exposure
some tips with that when you’re taking that second shot don’t just think you need to hold the camera one way you can turn it sideways you can turn it upside down you can do all sorts of crazy stuff and that’s the point here is to try to be really creative.
but you’re always wanting you to keep your framing from the first shot in mind. so you kind of remember where things are to try to get it to line up nicely with a second shot.
it’s tricky and one of the big things with these double exposures is you have be ready to make a bunch of mistakes a bunch of failures on your way to figuring out your technique and finding really cool stuff.
but that’s all the fun part of the process. along that similar idea you can do like a reflection shot where your first photo is something up right and then do the double exposure with that same thing upside down. As a Example…
SideWay Shot Mini 90
you can take shots where you combine two different contrasting ideas like some nice clouds and then some really urban architecture or you can do a shot where it’s two photos of the same object kind of shot in different ways so you’re kind of layering it on top of each other.
How Double exposure works ?
I’m going to be sharing some tips with you on how to shoot awesome double exposure shots with your instant film camera.
Okay so the first thing you need to know is just what the basic idea behind a double exposure is. What happens when you take a photo on a piece of film is that the camera opens up the shutter and light comes in to expose the shot and then the film comes out and that’s how you take a photo.
But with a double exposure what happens is that you take that first shot but the film doesn’t come out. It waits there. You take another shot that image also goes on the same piece of film.Then it comes out so you get two photos on the same piece of film and they kind of combine in often very unexpected and creative ways to give you something totally cool.
Its Looks like this…..

Example of Double Exposure
so we are gonna be going over some tips on how to shoot these and some things you need to make sure you keep in mind.
Because double exposure is kind of work in a funky way and if you don’t fully understand it your results will kind of be lackluster.
Before you start Double Exposure What to know ???
At first you have to choose or decide to photos. the first one should be telescope photo for the background. it will be best if the background would be the nature because it will come with the whole details.
the second photo should be a face or your full picture portrait.it doesn’t matter who is photo or image come first. it all depends on your choice because you should not follow all details cause it’s all your discussion how to do that nothing else.
You should have the feature of double exposure mode of your instax camera. that’s all, now take to get action.
do not worry if you don’t have the feature of double exposure mode in your camera, I’m going to tell you some tips and tricks of taking double exposure mode if you don’t have the feature in a camera in another article.
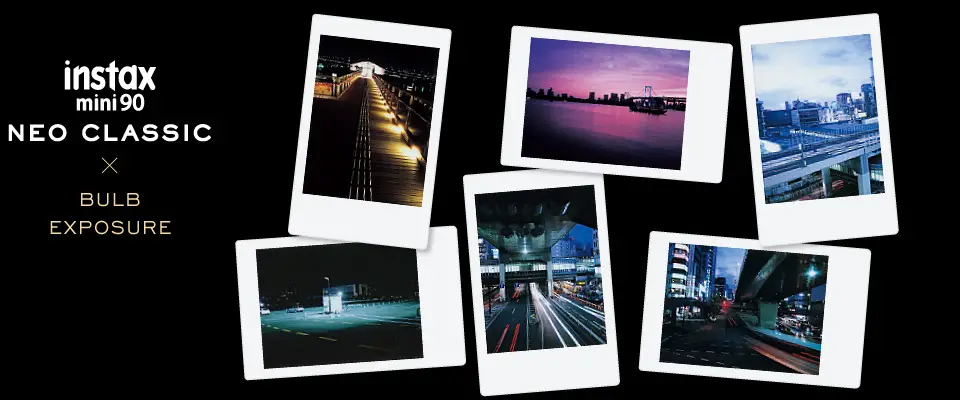
2Instax mini 90 Neo Classic – Bulb Mode
Today I am Going to talk about the very first Classical look Instax/Polaroid Neo Classic Camera. Instax mini 90 is named with Neo Classic Because of is classical look. With the Awesome look, It has Come with multiple crazy feature that might not you get with another one.
Why not try entertaining features offered by the bulb mode shooting ?
The instax mini 90 is also equipped with new functions and features such as macro mode and high performance flash, making this an instant camera for every photographer developed under the concept “NEO CLASSIC.”
Designed with a classic look, the instax mini 90 offers advanced features, such as bulb and double exposures,that are attractions of traditional analog cameras and offer an enhanced capability to capture light creatively.
One of the most popular mode of this Polaroid Camera is Bulb Exposure Mode and Double Exposure Mode. If you want to Know the exciting feature of Double Exposure Mode, You can read My Another article about this.
But In this Article, I am going to talk about the Bulb Exposure Mode with tiny details. So let’s get dive into to photography adventure.
What is bulb mode on a Instax Camera?
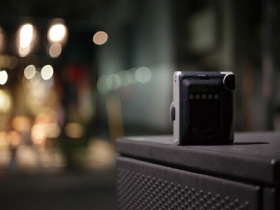
Bulb Mode Feature Image
Bulb mode is a feature of instant camera that allows the photographer to have a picture for as long as the shutter is depressed that’s mean You can enable the shutter to be kept open for an extended time in this case of Instax 90 Neo classic till 10 seconds.
By using this mode, you can have beautiful night view or painting Photos as well as Fascinating photos of colorful lights.
The Bulb mode is mostly used for night with long exposure to capture the colour variant. The exciting part of this mode is that it about the photographer to hold the shutter speed till 10 seconds that is allowed in the instax Mini 90 camera.
so you can use it write an adventure of every second with define color painting however you want.
why the bulb mode is special for instax mini 90 camera ?
It is the new feature of instax Mini 90 camera of the instax series. in this mood, when you hold the shutter,It will start pouring the colour into the camera surrounding by the environment on lights.
that’s mean whenever you keep hold the shutter button, It will start capturing by grabbing The colour using the light till the shutter is held. so that is why You can play with the light and people also now calling it’s night painting image.
How to change into Bulb Mode ?
In the instax Mini 90, there are many different modes you can play with, you can use them and be creative all you want.
The available mode are…
party mode
Kids mode
Landscape mode
Double exposure mode
Bulb Mode
One of my favorite Mode is, I am going to discuss about the Bulb mode. That is one right at the end is Bulb Mode with B sign.
In the instax Mini 90, there are two ways if you want to change your mode, the button on the back or using the dial the in Front.
What the bulb mode do is that it will leave the shutter open for as long as you were holding down the shutter release button for up to 10 seconds. Then the flash will fire or you can release the shutter whenever you want.
This Mode is just going to let you take a longer exposure and you are allowing the more light to come into the camera. You can get really cool results.
Let’s now start review this picture was shot in Bulb Mode.
How to use Bulb Mode Instax mini 90 Neo Classic ?
It’s very easy to use bulb mode in Neo Classic Instax Camera. First, What you are gonna do ? You are Gonna Turn the on. Cycle through the mode until you get to the B. The B stands for Bulb Mode.
So You will just see flashing once you select it. If the flash will automatically turn off because flash does not work well with bulb mode. You should make sure the flash is off.
Bulb Mode with flash
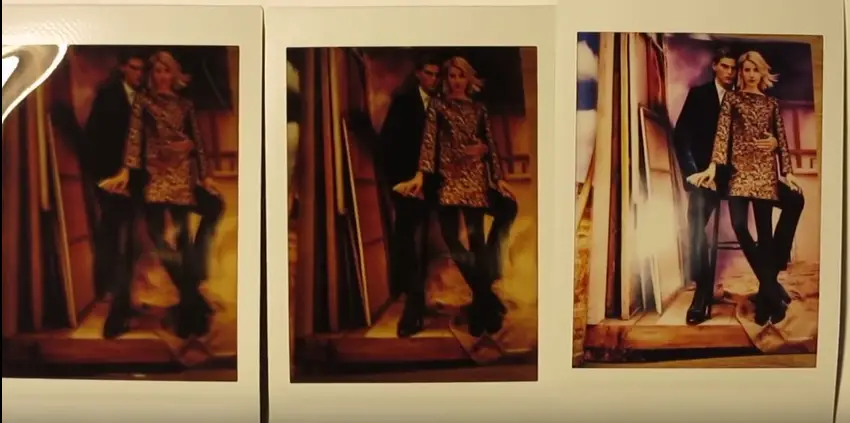
So what happened with this is that while Experimenting tested on power mode,The first image came out very blurry. Because of the camera is moved and the images came out blurred.
So, the second shot of instax camera with the same style was made sure hold the camera steady And it was ok with underexposed.
And the third shot was taken with the flashlight. look at this different of colour,How much more vibrant the colour are.
I think you got some real example of different kind of shot. And of course wine you will experimenting with different shot, you will find out the magic of the Bulb Exposure Mode.
What bulb mode does, when you shot polaroid, you press the shutter button and the lens will open and it will stay as long as you or someone holding the shutter button until 10 seconds.
So if you are taking a light painting photo with yourself or a long exposure photo. Then Bulb Mode is the best option.
What Light painting mean is that it will paint your photo like a portrait that will definitely look great.
What you are gonna need a light source of some kind. You can get anywhere in the night or I can recommend using your cell phone’s flashlight app. The Flashlight app work really well if you shot with Bulb Mode with Instax mini 90 Neo Classic.
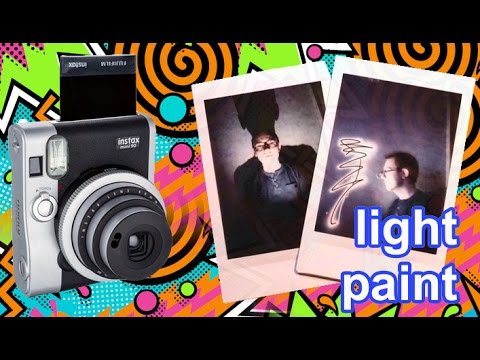
Light paint with Mobile app
So any kind of light source even a real flashlight will work perfect. You can also do this instax photography with Different kind of colours Of light.
You can flash in your face or room whatever you want. It depend what sort of result you do really like into your Polaroid or Instax.
You can Hold down the shutter open for so long till I guess 10 seconds. Within this moment or seconds, you can get define kind of images with bulb mode which is more exciting in this feature.
That’s mean, you will get different shot in every second if you want or you can fix what kind of result you need.
No 1 : Use Long exposure
you can capture the night views and light using long exposure feature by holding the shutter button. If you want best picture Polaroid of night photography, you can hold it until 10 seconds.
You can take awesome beautiful night photos and interior rooms photos by using bulb mode, which are hard to get with other models.
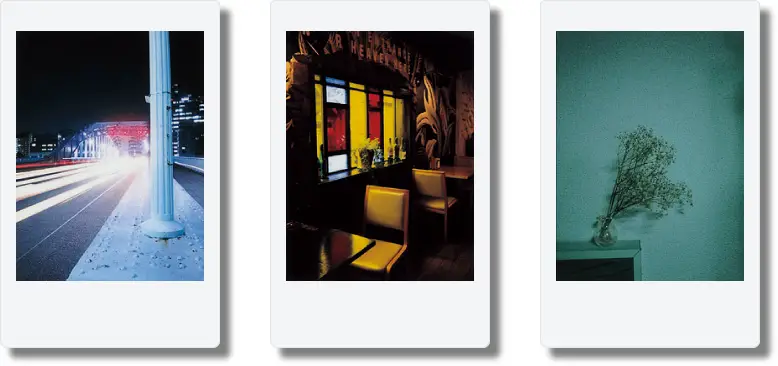
Long exposure night view images
No 2 : Use Tripod for Bulb Mode shooting to get perfect capturing
In the bulb mode, since the shuttle will remain open for 10 seconds, it might occurs shaking the camera while taking photos. that is why, I highly recommend it use of a tripod for getting perfect photos. In result, the images will not be blurred and you get nice shot of one.
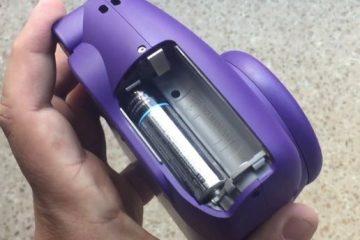
Just attach the tripod to the screw hole on the bottom of the instax camera and your are ready to take shot.
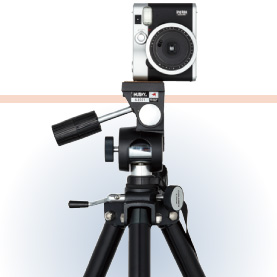
tripod for mini 90
No 3 : Control the exposure time in the bulb mode
At first instax Mini 90 camera has 10 second exposure length. so you can take advantage of the feature I mean length of exposure time.
While using the bulb mode, the photo stays open till the button is held down, allowing you To change the brightness of a photo depending on the length of exposure as you like. it difficult to adjust the brightness for the first time, but You will get a satisfaction after achieving the optimal finish.
Here are the simple photos below taken in a dark room. The photos are taken in different shutter speed which is 1 second is the first one, 4 seconds is the seconds one or middle one and the last was 8 seconds.
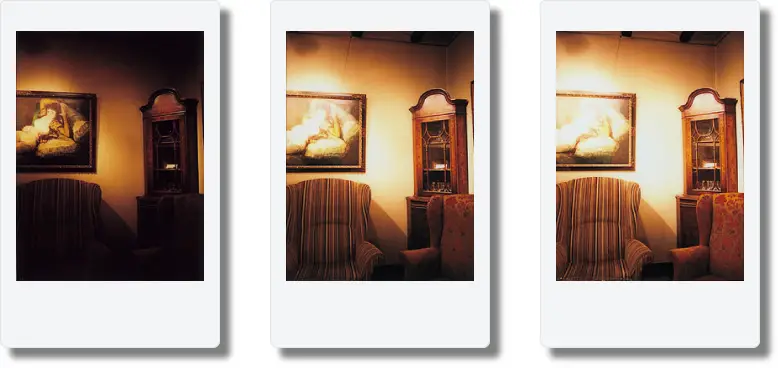
different shutter speed
Among the three photos, Here are the middle one is taken at the shutter speed of 4 seconds shows The furniture clearly maintaining The dark atmosphere of the room.
No 4 : Placed the Instax mini 90 camera on a Stable Surface
If you don’t have tripod, then you can use surplace place in case The camera can prevent the shake. you can take awesome pic with bulb mode outside on the street, Sky, Hotel, Cafe, club, I mean all kind of lighting effect perfectly.
instax mini 90 surface mode
No 5 : Depict ( to get same nature) room interiors in a natural color tone
The flash feature of Instax models always light in dark places to get the definite photo. but in the bulb mode of Instax mini 90,The camera turn off the flash Automatically, Focusing on the incandescent light as it is. It will capture the moment of light as you can see within your eyes.
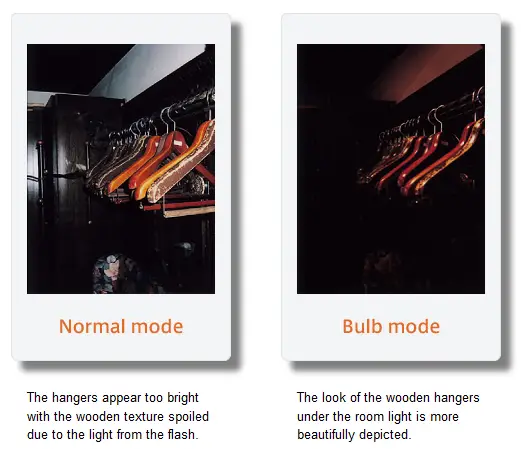
natural color tone
No 6 : Prevent Bright spot in the photo by using Bulb Mode.
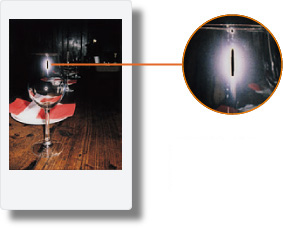
Instax Photo Bright Spot
It is common problem especially on digital camera while taking photo on party, club, wedding or any kind of night photography. During the fun moment of party, people are not aware of light or any effect.
Then what happen is people find out different kind of blurry photo with disgusting bright spot on the photo.
Actually it cause of reflection of object like glass or bright watch or can be anything. The reflection back into the lens, causing a bright spot in the photo.
What bulb mode do is came up with this solution. Bulb Mode can prevent this Bright spot problem.
No 7 : Mesmerizing night views sparkling like jewelry
During using normal mode, Maximum shutter speed of instax mini 90 is 1.8 seconds to take a Polaroid photo, which is not long enough to capture a glittering like night view, or special event like New Year festive or any cultural event based on light in the night.
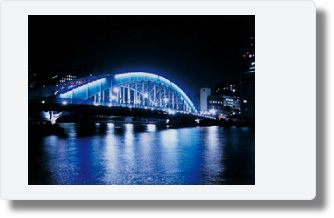
Night river image with Instax 90
On the picture, the light reflected on the river is also beautifully expressed. With the Bulb Mode it can be possible capture sufficient light and perfect night scene shooting.
No 8 : Use 1 or 2 seconds to get Portrait images
If Is there is so many people and you want to take photo alone or you want a polaroid image like a portrait, then it is a perfect method to capture the moment.
The normal shutter speed is 1.8 seconds, but you should hold the shutter button like 1 to 2 seconds. Then what would happen is that when you focus on the object other moving objects will not disappear but blurred.
Moving object will then get paint on the Polaroid. It would be better if you get more variant light.
Actually it will paint the light and it will take awesome photo as you can say A Portrait. it would be more fun when the vehicles with light pass by.
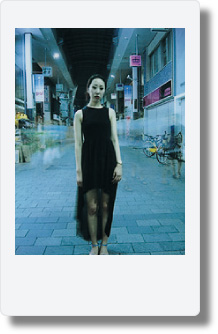
Portrait Photo Instax Camera
Here on the instax photo used the bulb mode to take and interesting photo of a person standing still amidst blurred images of passers-by. You can see other people are not showing on the photo but they are painted. The photo was taken on Shopping area at night. Passers-by appear like blurred streaks.
In this case the shutter speed should be 1 to 2 seconds. If it is slower than that, the passers-by will completely invisible in the photo.
No 9 : Trick with a penlight
One of the best way and my favourite to enjoy bulb mode shooting is playing with lights.Draw text or shapes with a penlight while shutter is open. The light trail will appear in the photo. You can take any light movement of colors to get the shapes by open the shutter until 10 seconds.
This Penlight photo was taken with the shutter kept open for 10 seconds, it is the longest time of Instax mini 90 for the bulb mode, allowing the heart-shaped light trail to be completed.
What the bulb mode did is absorbing the light surrounding the area till 10 seconds and did its great job. Eventually it makes photography more exciting using penlight.
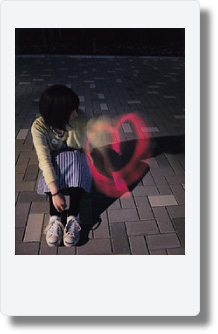
Penlight trick Instax Polaroid Photo
No 10 : Blurry trail of Movement
You can take a photo of a object movement or a person movement like a person moving from one position to another in the Bulb Mode and capture a blurry trail of that movement.
Here is a sample photo, it was taken when the subject moved to a new position every 2 seconds four times and got this. This is the interesting because here is the four images of the same person captured in one.
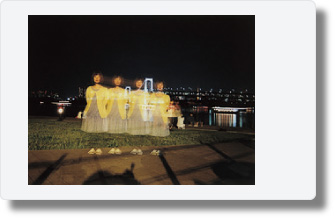
Person Movement Instax
You can move the Camera also using the tripod to get better shot. Like this flower taken by a YouTube guy.

tripod movement Polaroid or Instax
Tips, Before You Take Any Images | Instax Mini 90 Neo Classic
If you don’t use steady off the camera like tripod or standing on the plane surface, you will notice some glossy effect most probably in the corner of the picture. so I recommend you to use plane surface or tripod to take or use Bulb mode.
Sometimes pictures will get blurry if it is not in a steady position, so always keep in mind to put the camera in steady position when using bulb mode.
you can short you images in the cafe or like a coffee shop to get so very light.
sometimes, keeping the shutter open for the maximum 10 seconds is not good. Because it could make the picture so bright, there will be a lot of exposure once it developed.
This Polaroid picture was taken at the coffee shop, with instax mini 90 Neo classic, and in the picture you can see the nice lighting the shop has. the camera just absorbed the perfect amount of light at the coffee shop in just 5 seconds.
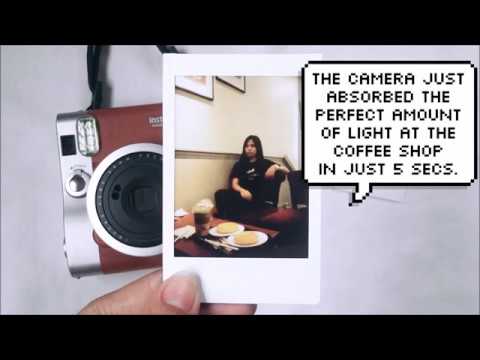
Coffe Shop Instax/Polaroid Photo
Things to keep in my mind when shooting in bulb mode:
1: use either a tripod or place the camera on something steady like a table or a bench.
2: experiment, play with it, you can control on how long the exposure you want on your picture.
So, the bulb mode here is another awesome feature one to definitely experiment with. There is so much fun you can do especially with instant film or Polaroid camera. Have fun with light painting, movement and nightlife photography.
3How to Use Macro Mode | Mini 90
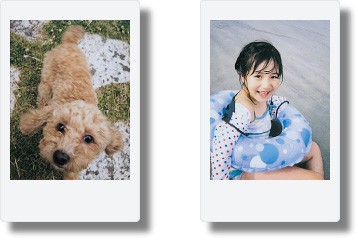
When you think about closer shot image or Selfie with Instax mini 90, then you have to choose Macro Mode to capture. In case you are not familiar with Instax mini 90 Macro mode. Here I am going to more in dept of macro mode with variety of short. The macro mode especially design for closer shot and selfie.
First, Macro mode does closer & clear shot-image for you. So that’s why it is chosen for Selfie also. It has auto function for get High quality image while taking closer shot with macro mode. It even have selfie mirror to get best selfie with great output. So let’s take ride with Instax mini 90 camera macro mode feature.
How to use Macro Mode ?
On the back of the camera, you will see there are five button feature to take different kind of shot. The first one with flower sign is called macro mode. After you turned on the camera, you need to press the flower button once to get started. Then you will see the same picture you can see on the LED screen of the camera. That’s mean you are now onto shoot. But make sure you have film in the camera. You can make sure by looking at the right LED mirror shown the number of film.
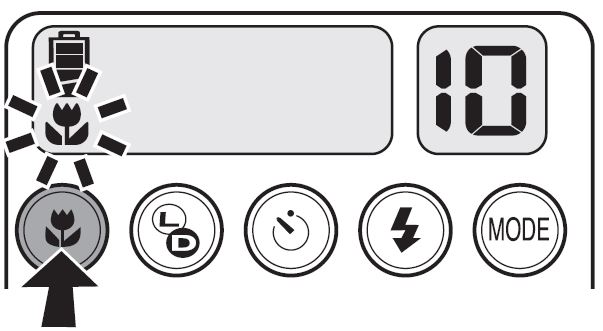
Macro mode mini 90
Here on the photo, you can see with arrow sign for macro mode. Make sure you have selected right button for macro feature. In case you have changed from macro to L&D, no worry for that. You can switch the mode by pressing the Mode button. Another way to changes to mode is to turn off the camera. If you turn on the camera, you can do fresh start with the feature.
Macro mode has automatic control for your image. So you don’t need to adjust the distance to take shot. Just look through the viewfinder and take shot. You will get lot of option with macro mode.
OK, after taking your shot you can cancel the mode by pressing the button or turn off the camera to switch of the mode with camera.
different between normal and macro mode?
The instax mini 90 can capture best and beautiful images in the normal mode, But If you want image according to your choice then you need to change feature or mode. For example the Macro mode can give you more closer shot as like as you want for your close picture. Just remember that if you want to take attracting photo of subject a short distance away, the common feature is macro mode you gotta use for your every shot. As a output, you will get a better close-up photo.
If you subject is at distance shorter then the minimum focusing distance from the lens, it might be out of focus. But the interesting feature is the macro mode is that you can see the different through the ViewFinder.
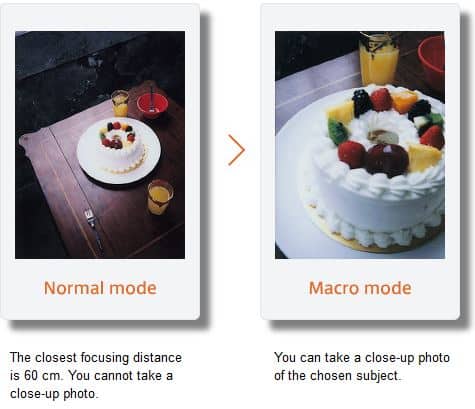
different between normal and macro mode
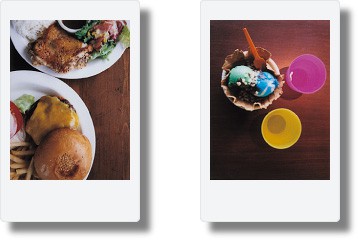
You can see the clear difference the Normal mode and the Macro mode of Instax mini 90 feature. Both image are good but you don’t need distance photo for your images like Birthday Cake instant picture. In this case the closer is better.
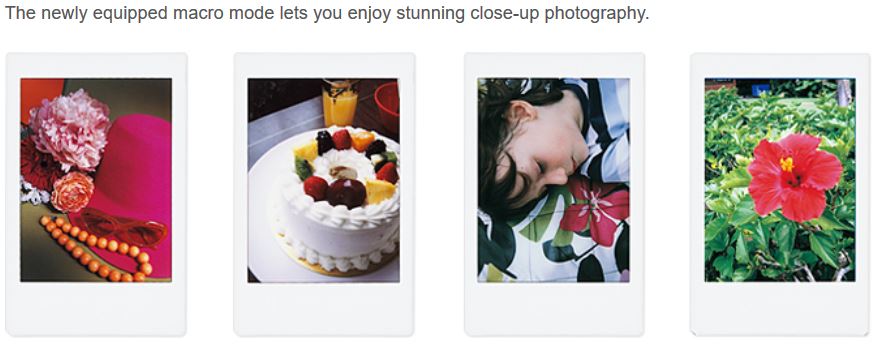
Macro mode pictures
Here on the images, you can see the beauty of Macro Mode. Actually, you will enjoy stunning close-up photography if know where to use this feature. If could be your best gift or apparel or dress or product or prizes to make as memory. It could be the birthday party of you or your friends or little angel whatever special it is. You can capture the memory instantly with so close shot. It always happen when you get outside weather it is garden or hiking, you always pleased with the beauty or environment. You want them to capture as close as you can. So then the feature is actively helpful for your best shot. I think, you make you got the point variety use of Macro-mode and the beauty of it.
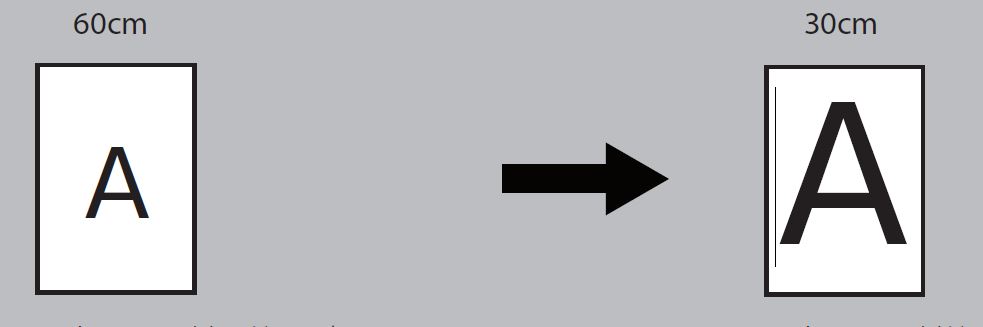
What distance is perfect for macro mode ?
The minimum focusing distance in the macro-mode is 30 cm. But if you want the sharpest images, then the distance should be 40 to 60 cm from the subject. Because when you get the distance of 40 to 60 cm, then images get perfect control of capturing. So the ideal distance for macro shooting is 40 to 60 cm for best shot.
macro mode Ideal distance
In the photo, you can see perfect shot of macro mode. You will always be crazy to take photo with the instant film if you get shot like this.
Distance doesn’t matter if you get expert using macro-mode. Because the camera will help you get the best shot and you just be careful of it.
Why distance is important ? It is possible that question comes to your mind and you will think ” Oh this is hard ” but actually it is easiest feature of instax line camera. All you need to know that everything you want is not to ruin your film. Because it is expensive when you get destroy your film. So that’s why you need to educate yourself a little bit more. Eventually, You will enjoy the journey to capture the memory. Another benefit of learning about distance is that expertise. When you learn what the 30 or 40 or 60 cm is, you can not only expert in all Instax camera but also digital camera. Because every camera has same feature and you can switch camera whenever you want. It is also same for the instax-mode.
Distance difference between 30 to 60 cm
Here is the actual output you will get after you know the difference between closer and distance shot.
The Special build-in feature with macro mode is Viewfinder
I have been talking in this article about one really cool thing is the automatic-feature of the mini 90 and that is the View-Finder. So what the viewfinder is going to do ? When you put macro mode on, the viewfinder actually changes a bit automatically. That is quite different from the other mini camera. So with the other cameras, you have to make the composition right or viewfinder can not make sure the distance of the subject. It’s a little bit confusing but with the mini 90 it is not.
It’s a combination feature of macro mode and viewfinder. Together they perform better for taking closer shot or selfie. So that is why it is one of the best combine feature of the mini 90 camera. The viewfinder is going to tell you about your shot. How would it look like after taking the shot. So for this your get best closer shot with macro mode.
After having macro mode on, the camera let the viewfinder help detecting the subject. Because the mini 90 has the auto feature for detecting the distance, it will help you to get perfect shot for your subject.
Can I use L&D mode with Macro mode ?
Yes, you can use L&D with macro mode. This is the coolest feature of the mini 90 camera. You can use with L&D with all mode. First you should know what L&D does for your shots.
Sometime when you take photo with macro mode, it might possible to get a little dark. So then you use the L for getting light with shot. Here is the interesting part is that there is another light option to get more light with the camera which is L+. In case you get more dark for shot or you think you need more light for your picture, you can increase the exposure by using the L+.
On the other way, if you wanna get little dark for your image, use the D with macro shot. Then you can get dark image with the picture.
Macro mode L&D
Here on the picture you can see that the left picture is taken with L mode and the right is taken with D mode. First picture get more light with macro mode so it is looking bright and Second picture is looking perfect with the dark mode. It depend on environment wherever you are. The both picture get perfect exposure with macro mode.
All picture can get more quality if you use the macro feature with exposure according to exposure situation.
Use together with L, L+ and D for short- The lighten and Darken option is another mode of the mini 90 camera but you can use it by simply pressing on L&D button with macro mode. On the macro mode, when you press once L button will show in the LED screen, then press again you will see the L+ on the screen and with the third press you get the D mode. That’s it.
Macro mode does not require any complicated procedure but when you think the photo likely to be dark use the L mode in case of Light use D mode. Although the camera have automatic exposure control that’s mean the camera can detect the light and dark with itself, but sometime you can take a bit more control of Exposure by using L&D by making lighter or even more lighter or Darker according to your choice.
So if you are shooting in low light or the photo is too dark, you can basically use the brightness to adjust of your photo by selecting L, L+ and D modes which makes the colors in macro photos more vivid.
How to take Selfie with in mini 90 using Macro-Mode ?
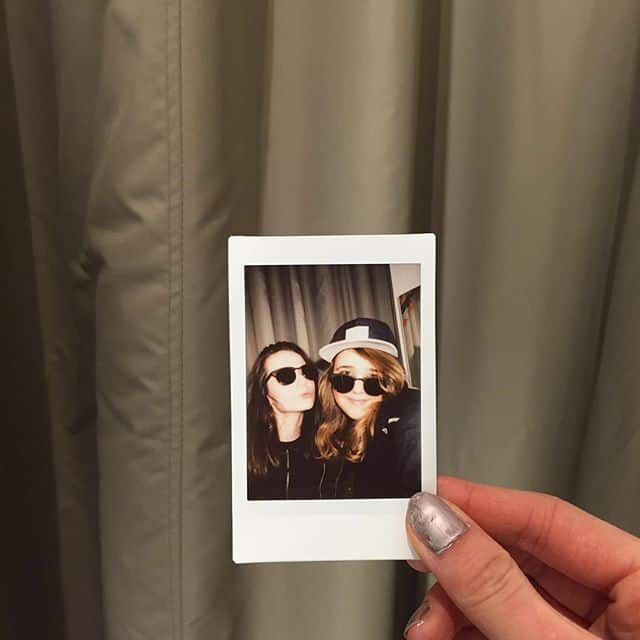
Macro mode selfie
Unlike other cameras in the instax mini series, the mini 90 have come with special feature called macro mode for taking selfie and closer shot. Although you won’t find a mirror beside the lens, you can see your portrait on lens though. It focuses on closer shot than selfie. So how to start taking perfect selfie with mini 90 ? Let’s find out now.
Perfect distance is for taking sharpest results is the range between 40-60 cm. If you hold the camera out at arm’s length like normal people do, you are pretty much guaranteed a sharp shot. If you want to know more about distance, you can get in this article about this. I have discussed why a little bit learning of distance get help to get better shot.
By using the macro mode, you can take selfie. What the macro does is that it reduces the distance from the subject like other instax camera for closer shot.
In fact, the amazing thing is that when you activate this mode, you will notice the lens physically adjust automatically. Another great feature comes with this is that it adjust with the viewfinder also. Since the lens adjust automatically, there is no need for extra lens.
That is why anything within this range ( 30 – 60 cm ) will be in sharper focus than the background, and you get exact result what you want for self portrait. It is not very difficult to take selfie with mini 90. It is normal like you do with the phone camera. But you can ensure the composition by seeing the reflection in the front element of the lens. In the right light, the glossy surface of the lens can work perfectly as a selfie mirror in mini 90.
What to know before taking selfie indoors:
-
- Get the right brightness when you take selfie indoors. Although the camera has auto exposure control, so you can get best photo with selfie. You can change the L&D mode based on the situation for taking selfie.
-
- You have option L&D modes in case you are in the dark. That’s why this mode can help for taking selfie.
- You can use different kind of selfie lens to take selfie.
What to know before taking selfie outdoors:
-
- When you are in outdoors, the potential of taking best shot get higher and higher. Just find the right brightness to take shot.
-
- Afternoon or Cloudy or Shadow or nature can be best moment for taking selfie.
- Always try to use L&D in case there is too dark or too light. You have got three best option to control the light to get better photo.
Should I need extra lens for mini 90 ?
Although you can get perfect selfie by watching yourself portrait on lens, I think you don’t need it to take selfie mirror for extra lens. If you want a selfie mirror you can buy it on amazon. The mini 90 comes with so many amazing feature with it so that you can get more adventure with photography world. Most of the people try to use all the feature to make more memory for their own. In case of selfie, it does not matter how perfect you got the shot otherwise it is all matter of expression you take while taking your portrait alone or with friends.
So enjoy the macro mode feature and get best shot of your capturing. So before doing any kind of shot with the mini 90 camera, just know how to do that. It won’t take time to be expert. But if you spend a little time by educate yourself, you will get best picture as you want and you will never ruin you film and moment of capturing.
4How to use Kids Mode ?
Kids or Child or Sports mode mini 90
OK so you have grasped the idea of how take a good photo with your mini 90 instant camera, and now want to know how to photograph moving objects. Whether you are capturing an object such as Party dance, Double image, short or long distance or kids laughing or your pets, the camera technique and settings are basically the same.
The main camera setting you need to take notice of when shooting moving objects is the shutter speed of instax camera, And you can find this feature in Kids Mode. This is going to get sharp photos of fast-moving subject. It can be you walking or riding cycle, or laughing or taking with arm-move or your favorite pets of picture that you are trying to get best shot. You just need to know how it is going to work.
Benefits of kids mode
This mode is called kids mode because of moving subject like child. Actually You can call it Child mode or Sports mode because this function is design for moving object. If you understand the theory of Kids mode for moving subject, then you will overcome the output of your Instax mini 90 blurry picture output. You can take the move shot like, Jumping, running, swinging, hoppin, sliding, and skipping. However, it’s frustrating when you try to get the perfect shot and your images turn out blurry. You can fix it by yourself though. By taking couple of shot, you will know the timing and tricks to get shot.
How to use Kids mode ?
There is a mode button on the back of the mini 90 camera. By pressing this, you can cycle through different mode of mini 90. So when you start the camera press the mode button until you get the kids sign like bellow.

Kids mode logo on LED Screen
After selected the kids mode, you are ready to take fast moving shot. That’s very easy. You can also change the mode using the Dial changing it by hand. It is up-to you how you feel comfortable with it.
different between kids mode and normal mode
When you take picture generally from your camera, the output picture is normal mode. In the situation for speed subject you have to change the mode to kids mode so that you can get the movement picture also. That’s the main feature of kids mode. But when you take photo of any movement subject that need more shutter speed to grasp into the camera lens.
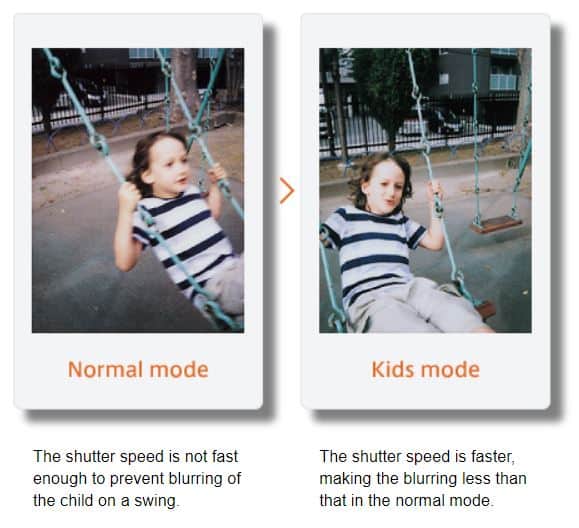
Normal mode and Kids mode
In case of these photos, you can see that left picture is blurred. Because the subject is moving fast the normal mode is not able to get every portion. It only get the stable background clearly because it’s not moving. But the Subject or Kids was moving and it gets blurred.
In the second picture you can see that the picture output is clear. For this picture, the camera function has been used the kids mode. What it does is that it speed up the shutter and get instant photo as much it can. After that you can see the output and difference between the Normal Mode and Kids mode.
How to reduce blurring using kids mode ?
Troubling blurred situation with moving subject ? it can be almost reduced by kids mode. The kids mode help to maximize shutter speed using kids mode. Increasing shutter speed you will get moving subject cleared for subject like child or animal. Anything that’s going to be quick and moving fast, the sports mode or kids mode is going to use the fastest shutter speed possible with the widest aperture combination.
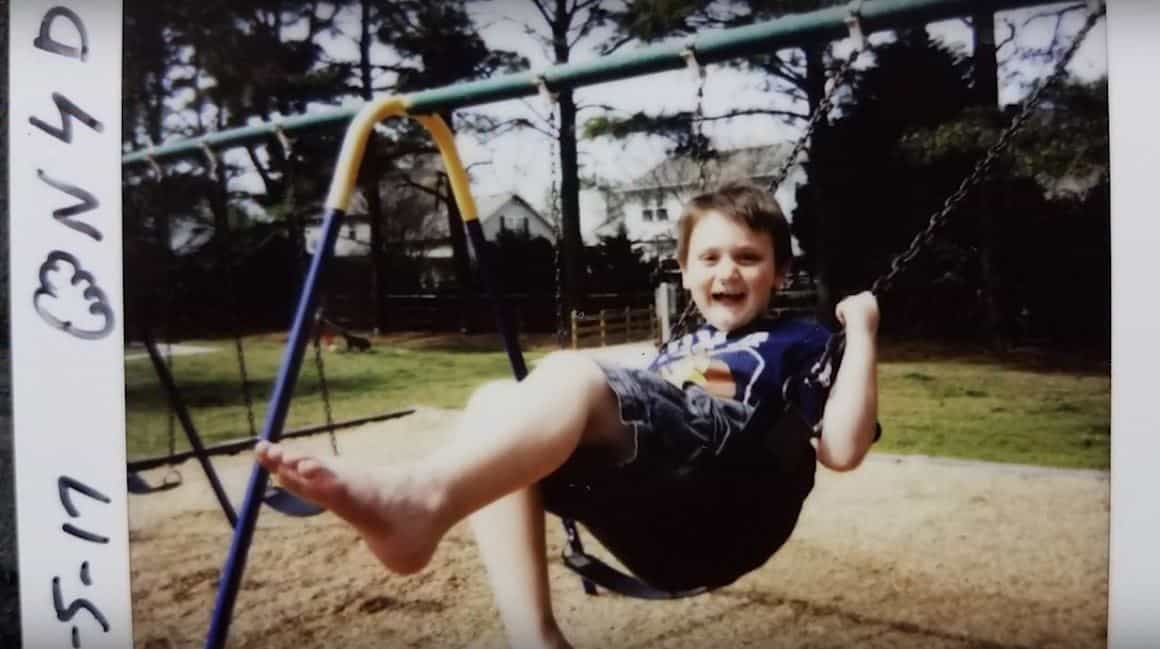
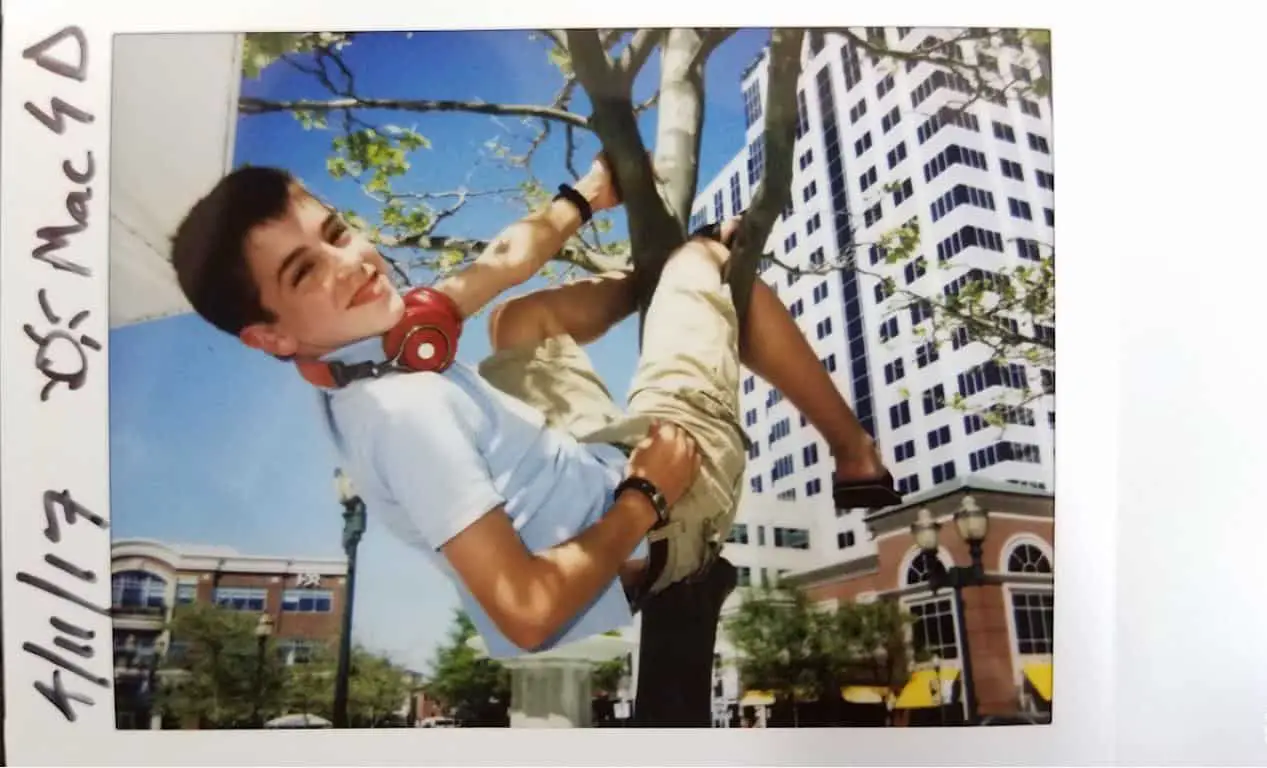
sports mode mini 90
In these picture, you would see that the picture output is very good. Even though the subject or boy was moving faster, the camera can capture all the portion of subject. When it is used kids mode, the camera gest widest aperture combination to get the perfect image.
What is the best situation for Kids mode ?
Indoors- You can use it in indoors such as room light. Here you can get perfect situation for taking fast-moving subject picture. So the light mush need but it should be low. Suppose you have Birthday party event and you want to take some photos of having food or you want to take some the kids photo then you should use kid mode. Why ? because kids always mode even you try to freeze them. So in this case you can get your shot whenever you think it’s best time for great shot.
Cloudy- When you do thinking best photo for outside indoors then you should choose cloudy moment. You can get better light for using kids mode. For example, you are with your friends and you want to take some stylish photo of walking or fighting or jumping and jumping is best choice, then if it is Cloudy situation go for the moving shot.
Outdoors- Sometimes you will get little bright situation but you also wanna take shot then use L&D for this. I have discussed about L&D on this article a little bit more. L&D is the best supporting option comes for quality output of your shots. I have another article about Light and Dark and how to use it for taking best shot. Be careful don’t take shot over light. Because in that situation, The output may not get better as you want.
Low light- Picture like smiling, arm-movement or pet can be helpful for taking the shot with kids mode. Use low light while using kids mode or fast-moving subject. Because in the Low light condition, mini 90 can perform more best. Yes Most of the time you want to take picture take picture of Dragon fly or Cat or dog. If it is the situation for you then don’t worry taking shot with kids mode. Be careful while taking picture if the animals are too fast.
When to Use L&D for fast moving subject?
Although you should take picture in some low light or cloudy, but it might happen when you are outside but there is little sunny situation. Then you can use Dark function with kids mode. How to do it ? OK, First select your kids mode by pressing mode button & then press L&D for dark mode.
4 tips to get best shot with kids mode for fast-moving subject
There is so many time when you want to take simple moving picture. Most of time, you will get moment to take picture of having fun. Here is how you can get best moving photos with your instax mini 90.
1. Use energy for taking shots – people Have too much energy ? then ask them to scream as loud as they can. This leads people the giggles for them and happy, silly photos for you. You will get really fun output picture. Cheers photo could be taken if you want to.
2. Take picture while eating – Have snacks on hand is more memorable moment that you can get. In the Birthday party, Club, Event or there are so many situation that you got people having foods but you want to capture this moment too. Then you can take this by using the Kids mode.
3. Taking of slow movement picture – You can take slow-movement picture by telling your subject to learn them how the camera is going to work. Just take some time to sit down with them, Show them how the camera is capturing them and explain what the photos are for.
4. Smiley photo – When you wanna take shot of smiling people, it will be more easy when you are in Kids mode. You can make them smile while taking photos or tell them to pronounce three or cheese and get the shot.
5What is Landscape mode ?
sharpness picture using landscape mode
Today again I am going to talk about instax mini 90 modes. This time let’s talk about landscape mode. This feature is amazing compare to other instax. The output is very productive using landscape mode. You must need it for capturing your favourite view or picture through landscape mode. This feature is only for distance view like 3 meter or above. So you can capture your favourite view or moment which is 3-meter-plus distance.
First of all, Mini 90 has built in point-and-shoot ability which you just pick the camera up and begin shooting without hesitating. But you should be aware of little more knowledge to make it more sharper as an expert photographer. So i did more research of landscape mode and found more interesting tips that’s made my experience more fun.
Landscape mode is more advanced featured in mini 90 for distance photo. It shoots 3 meter and above distance subject with sharpest output. That’s is why it’s more popular feature in mini 90 like double exposure mode, bulb mode or macro mode etc. You will see step-by-step guide which I used for landscape mode. Timing for using this mode- I mean what time will be perfect for this feature for better output, Major difference between Default mode and Landscape mode and many more. Overall you will love the sharpness of landscape mode which gets more dept focus on the subject.
How to use Landscape Mode
It is more interesting mode in mini 90 camera. First it is going to change your focusing distance. It has come for getting more sharpness in your picture. By pressing the mode, you will see a mountain on the LED screen which is landscape mode. Landscape mode changes the focus distance of the mini 90 camera. Normally, the distance is 60 cm to 3 meters. After selecting the landscape mode it’s turned into 3 meter to infinity. That’s mean you can get the shot of longer distance object or subject.
Hers is the mountain sign you will get after pressing for landscape mode. Just select it and go for shooting to longer distance.
mountain sign
When you use this mode, you will get sharper photo output and the fuji has done very good job for this mode also. You will get really amazing picture after taking shot with landscape mode. What landscape mode does is that it’s focusing on the right thing. Having those different ranges, this camera is now more perfect to get shot.
As it is going to use slow aperture and it may or may not use flash automatically just depending on what the lighting condition are. It’s trying to capture thing like sunset, mountains like above. That’s the reason it’s going use smaller aperture and then a larger aperture if necessary. But you don’t need to focus on that. Because the camera will do its job itself automatically after you select landscape mode.
When to use landscape mode ?
It will be great timing when you are walking or traveling and you get the most interesting view to capture in your camera as like as your mind. This moment will come now and then in your life. So that is moment. Be ready to capture the shot for that.
Long distance photo- I have discussed that the landscape mode is for longer distance shoot. It is 3 meter to infinity. Every time you will get better shot if it is nature or event or view. In the picture below you can see picture of coast with building and it was a perfect moment to capture this view.
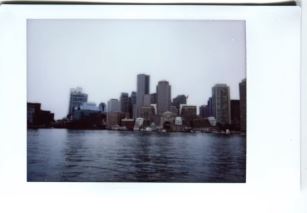
landscape mode Long distance
The water and building is captured sharper and it’s look great. It’s really fantastic feature compare to other modes.
Sky view- It’s amazing even if you take sky view with your best scenario. Fuji made this feature as good as digital camera. You would be shock when you will see how the output is getting better and better. In the photo you can see that the sky view is captured more perfect than I imaged.

landscape mode Sky View
You can get best shot of timing around living place. Just take it and enjoy the result.
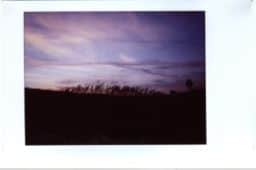
Nature view- You will must get best photo if it is nature view. When I go out and try to take shot of different nature, the output is always best of it. Even it is sea, snow, tree or any view with some light. You don’t need to be so expert to get best photo of nature. Because there are always perfect color and light combination on that moment.

landscape mode Nature
In this picture, you can see the almost perfect output of the nature view. It’s look like that somebody is painting the view more and more. Actually I like this picture very much. It will be fun when you will get amazing picture like this.
Note: Sometimes, the result is blurry. But it will be fun when you experience it how and when to shoot with landscape mode.
landscape mode Blurred
Here you can see, In this picture, there are lack of light so that it could not get better output. But there might be other reason for getting blurred image. So take shot and learn the secret more of landscape mode feature.
Default Mode vs Landscape Mode
As I said before, when take long distance picture, you should on landscape mode for sharper picture. Here you can see testing of landscape mode and Default mode. Landscape mode need at least 3 meter distance to get best result of your picture. On every picture is taken from two separate camera at the same moment so that you can see how landscape mode work and the difference from normal or default mode.
Default vs Landscape Mode test
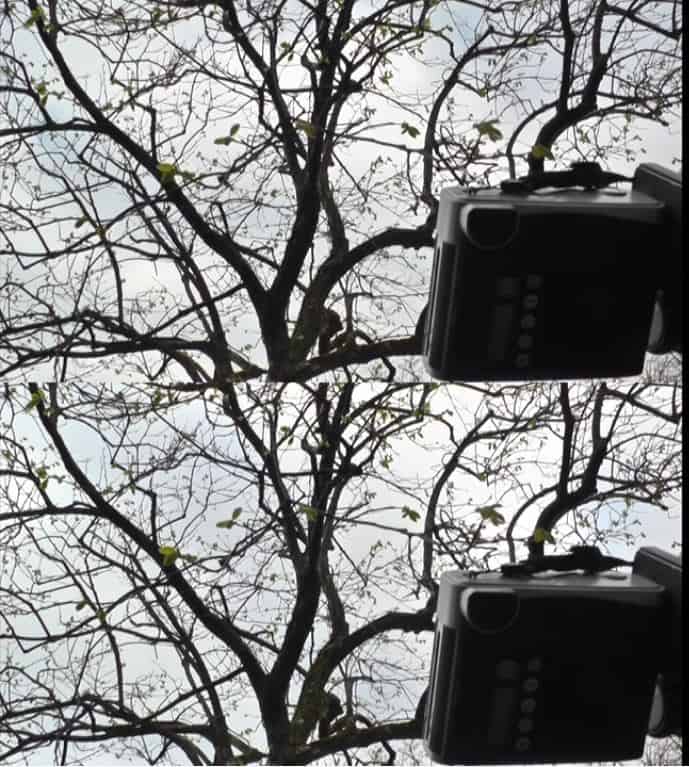
Test 1
First start with a tree with dry leaf so that you can understand the sharpness of the tree and sky light. In the first picture, the default mode, you can see that the picture is little blurred. It will hard to understand when you try to look closer. And the second image, the landscape mode, you can see the sharpest result and even you can see the leaf clearly with blind eye.
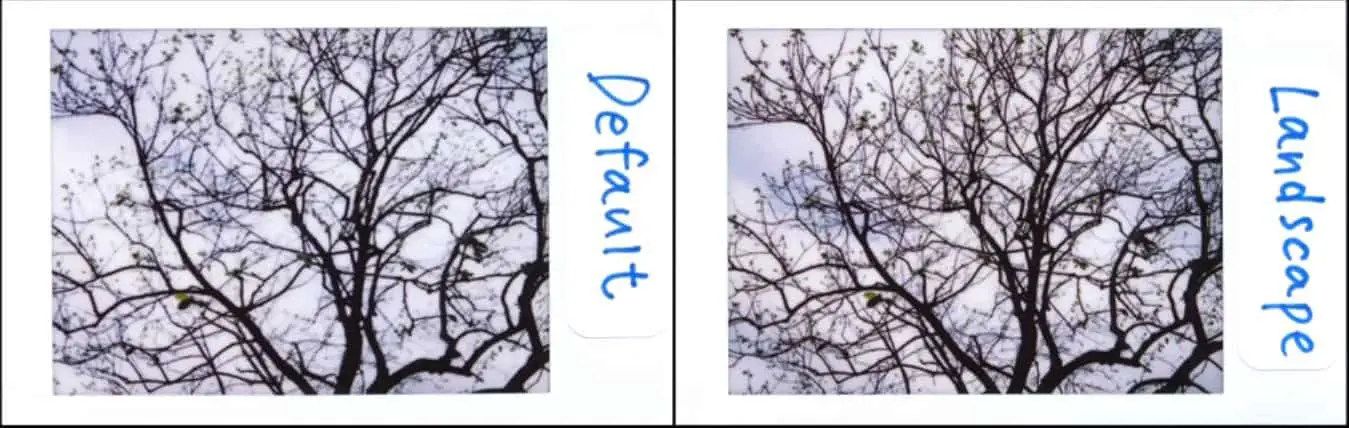
Default vs Landscape Mode tree
Test 2
OK, starting with the second example, here in the picture you can see of a store front. Same technique has been used for this pictures. One is default mode and another is landscape mode. The cameras was set far away from store more than 3 meter obviously.
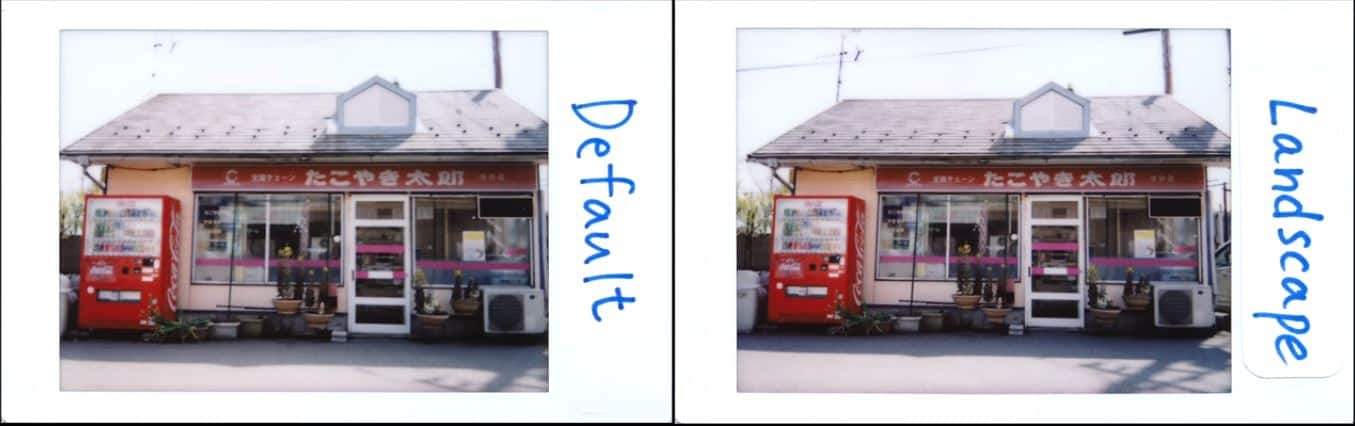
Default vs Landscape Mode store
In the default mode, the title of the store hard to understand. The left side cable with bar almost disappear and the shadow also is not clear. Even the roof is also faded. The result is blurred for distance photo.
In the landscape mode, the right side picture, you can see the better output than the default. You can read the title and see clearly through blind eye. The feature has got the cable and bar also and roof is also looking nice. The roof is not faded by extra light. The landscape mode has done its job almost perfectly.
Test 3
Now at the third example. Most of the people or neighbor or you have garden in the yard. The garden has beautiful flower with nice leaf. Suppose you want to take picture of your garden with home. And you want to get the all background view using this mini 90 camera. If you don’t wanna use macro mode for closer shot only for flower picture, then you can use landscape mode to get clear composition.
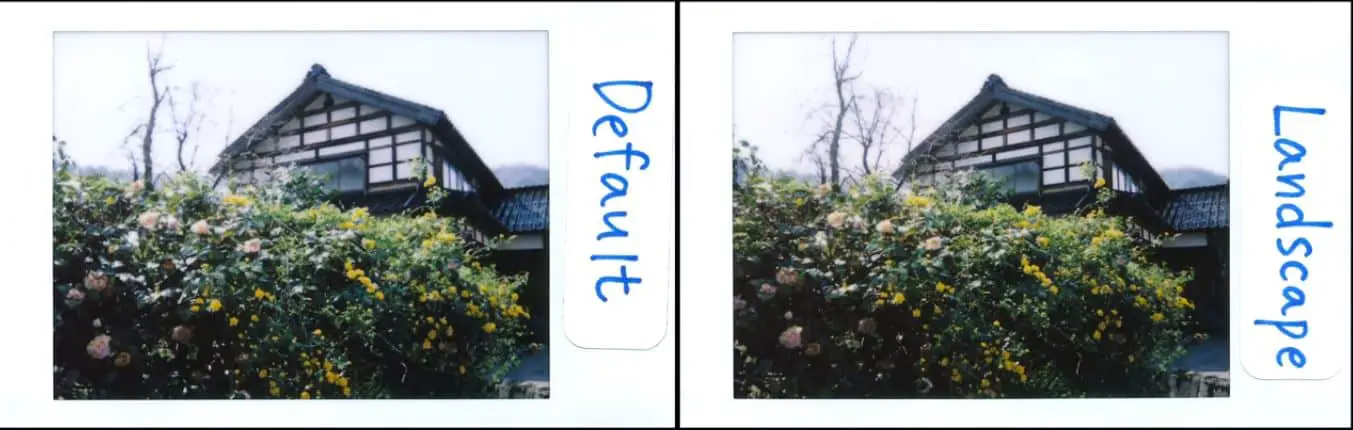
garden with home- landscape mode
In the default mode, you can see the picture is pretty much clear. The flower is looking great even the moe is clear. But there have something missing in the picture. The background tree is not clear and the little portion of the flower and leaf are missing. Since this the color photo, you can not see most of the lacking of the output.
In the landscape mode, this is the almost same output but I am going to explain the different. At first you can not understand the different. But after having taken photo with landscape mode you can see different between them.
The first different is the brick. Yes, at first see on the default picture. On this picture, right bottom of the flower tree, you will see the brick is almost blurred. Tin Shed of the home is also look blurred. But in the landscape mode, everything is alright even the flower and tree is captured perfectly.
Test 4
In the test 4, you can see there are lot of pick flower in the garden. The camera was actually set 3 meter less. So the front flower is looking blurred. So now you will believe that the distance is important. Since there is too much flower populated, so the camera could not captured all the flower. But in this case, you can use macro mode to get better shot. If you want to get better photo like this situation, you should get yourself right position for best shot.
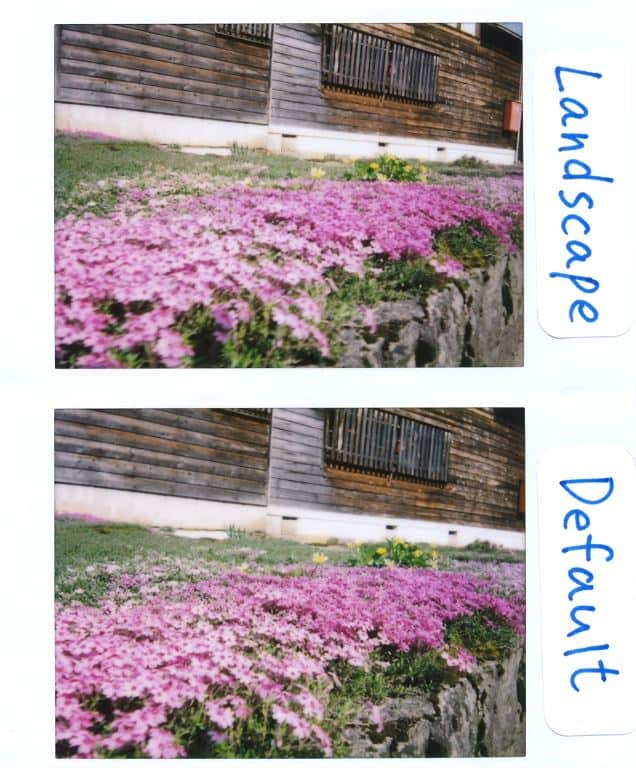
Lots of flower-Landscape mode
Test 5
Here is the interesting one. According to the rules, distance from the picture to camera more than 3 meter. That’s mean you can get best example of default vs landscape mode. You also can see the difference between sky as well as cloud.
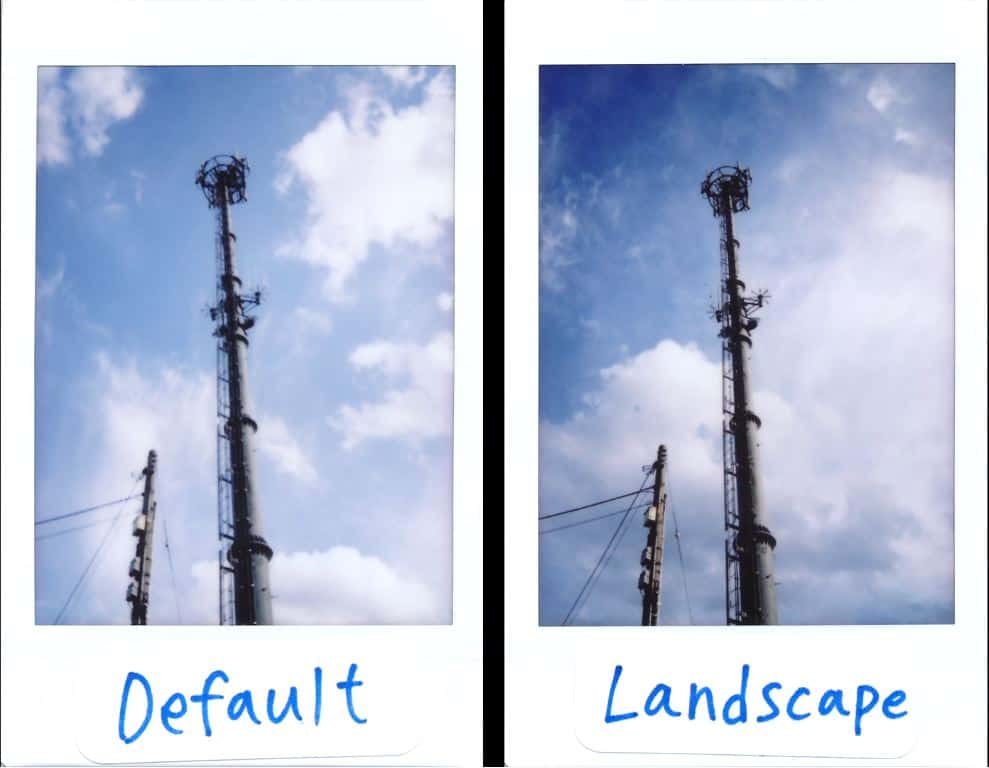
Default vs Landscape Mode Sky
At first, in the default mode, the poll is literally blurred and the cable is almost disappeared. Poll and cable is turned into little white far from actual shape or color. And if you look at the sky, you will notice that sky and cloud did not get true blue and white colors.
In the landscape mode, the picture has slide up perfectly and look great. First, the poll is not blurred like default mode and the cable is not disappeared and it can watch with blind eye. The sky gets perfect blue color as it was while taking picture. The cloud also is mixing up with the sky and looks perfect.
Click here……….Top tips & Tricks of Instax mini 90 Neo Classic
Click Here.……7 Tips and Tricks of Macro Mode You Might don’t know of it.
Click Here……… to Get More Details Use of Light Dark and how to use them with all mode
Click Here ………….to know If you want to avoid blurred photo, then
Click here………….. Why You are about to love this New Kids Mode
Click Here ………to Get Details – How Landscape Mode Work with 5 TEST
Click Here……….. to Get More Details Crazy to Use of Double Exposure Mode
Click Here.……… to Get More Details the 10 Magic trick Using of Bulb Mode
Click here……….Understanding 5 shooting Modes Mini 90 | Advanced Guide

0 Comments