sharpness picture using landscape mode
Today again I am going to talk about instax mini 90 modes. This time let’s talk about landscape mode. This feature is amazing compare to other instax. The output is very productive using landscape mode. You must need it for capturing your favourite view or picture through landscape mode. This feature is only for distance view like 3 meter or above. So you can capture your favourite view or moment which is 3-meter-plus distance.
First of all, Mini 90 has built in point-and-shoot ability which you just pick the camera up and begin shooting without hesitating. But you should be aware of little more knowledge to make it more sharper like an expert photographer. So i did more research of landscape mode and found more interesting tips that’s made my experience more fun.
Landscape mode is more advanced featured in mini 90 for distance photo. It shoots 3 meter and above distance subject with sharpest output. That’s is why it’s more popular feature in mini 90 like double exposure mode, bulb mode or macro mode etc. You will see step-by-step guide which I used for landscape mode. Timing for using this mode- I mean what time will be perfect for this feature for better output, Major difference between Default mode and Landscape mode and many more. Overall you will love the sharpness of landscape mode which gets more dept focus on the subject.
How to use Landscape Mode
It is more interesting mode in mini 90 camera. First it is going to change your focusing distance. It has come for getting more sharpness in your picture. By pressing the mode, you will see a mountain on the LED screen which is landscape mode. Landscape mode changes the focus distance of the mini 90 camera. Normally, the distance is 60 cm to 3 meters. After selecting the landscape mode it’s turned into 3 meter to infinity. That’s mean you can get the shot of longer distance object or subject.
Hers is the mountain sign you will get after pressing for landscape mode. Just select it and go for shooting to longer distance.
mountain sign
When you use this mode, you will get sharper photo output and the fuji has done very good job for this mode also. You will get really amazing picture after taking shot with landscape mode. What landscape mode does is that it’s focusing on the right thing. Having those different ranges, this camera is now more perfect to get shot.
As it is going to use slow aperture and it may or may not use flash automatically just depending on what the lighting condition are. It’s trying to capture thing like sunset, mountains like above. That’s the reason it’s going use smaller aperture and then a larger aperture if necessary. But you don’t need to focus on that. Because the camera will do its job itself automatically after you select landscape mode.
When to use landscape mode ?
It will be great timing when you are walking or traveling and you get the most interesting view to capture in your camera as like as your mind. This moment will come now and then in your life. So that is moment. Be ready to capture the shot for that.
Long distance photo- I have discussed that the landscape mode is for longer distance shoot. It is 3 meter to infinity. Every time you will get better shot if it is nature or event or view. In the picture below you can see picture of coast with building and it was a perfect moment to capture this view.
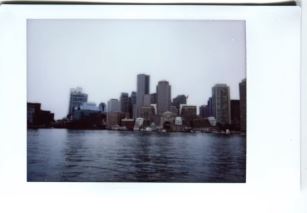
landscape mode Long distance
The water and building is captured sharper and it’s look great. It’s really fantastic feature compare to other modes.
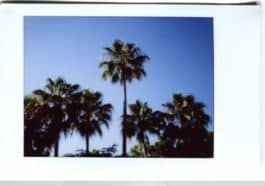
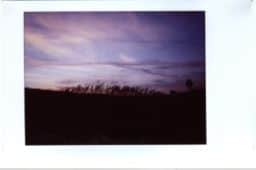
Sky view- It’s amazing even if you take sky view with your best scenario. Fuji made this feature as good as digital camera. You would be shock when you will see how the output is getting better and better. In the photo you can see that the sky view is captured more perfect than I imaged.
landscape mode Sky View
You can get best shot of timing around living place. Just take it and enjoy the result.
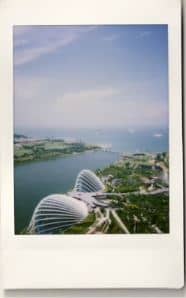
Nature view- You will must get best photo if it is nature view. When I go out and try to take shot of different nature, the output is always best of it. Even it is sea, snow, tree or any view with some light. You don’t need to be so expert to get best photo of nature. Because there are always perfect color and light combination on that moment.
landscape mode Nature
In this picture, you can see the almost perfect output of the nature view. It’s look like that somebody is painting the view more and more. Actually I like this picture very much. It will be fun when you will get amazing picture like this.
Note: Sometimes, the result is blurry. But it will be fun when you experience it how and when to shoot with landscape mode.
landscape mode Blurred
Here you can see, In this picture, there are lack of light so that it could not get better output. But there might be other reason for getting blurred image. So take shot and learn the secret more of landscape mode feature.
Default Mode vs Landscape Mode
As I said before, when take long distance picture, you should on landscape mode for sharper picture. Here you can see testing of landscape mode and Default mode. Landscape mode need at least 3 meter distance to get best result of your picture. On every picture is taken from two separate camera at the same moment so that you can see how landscape mode work and the difference from normal or default mode.
Default vs Landscape Mode test
Test 1
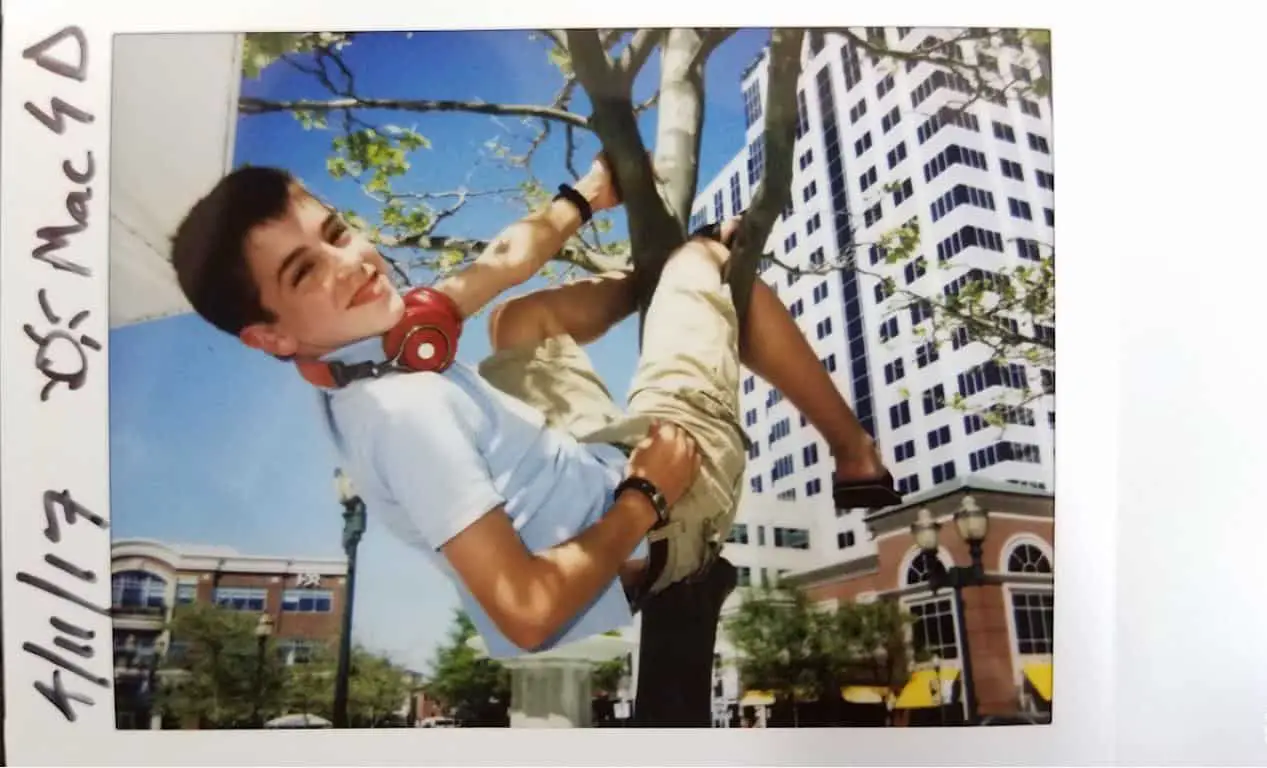
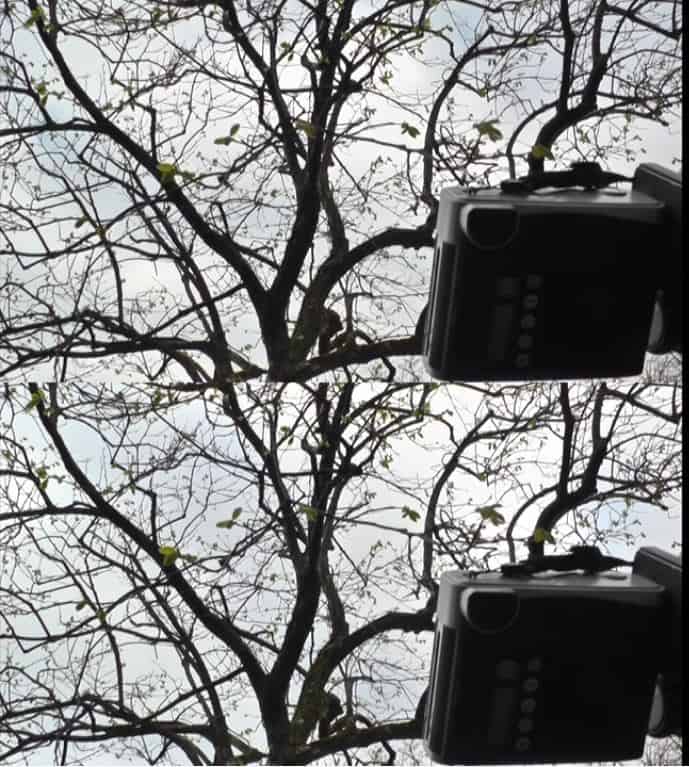
First start with a tree with dry leaf so that you can understand the sharpness of the tree and sky light. In the first picture, the default mode, you can see that the picture is little blurred. It will hard to understand when you try to look closer. And the second image, the landscape mode, you can see the sharpest result and even you can see the leaf clearly with blind eye.
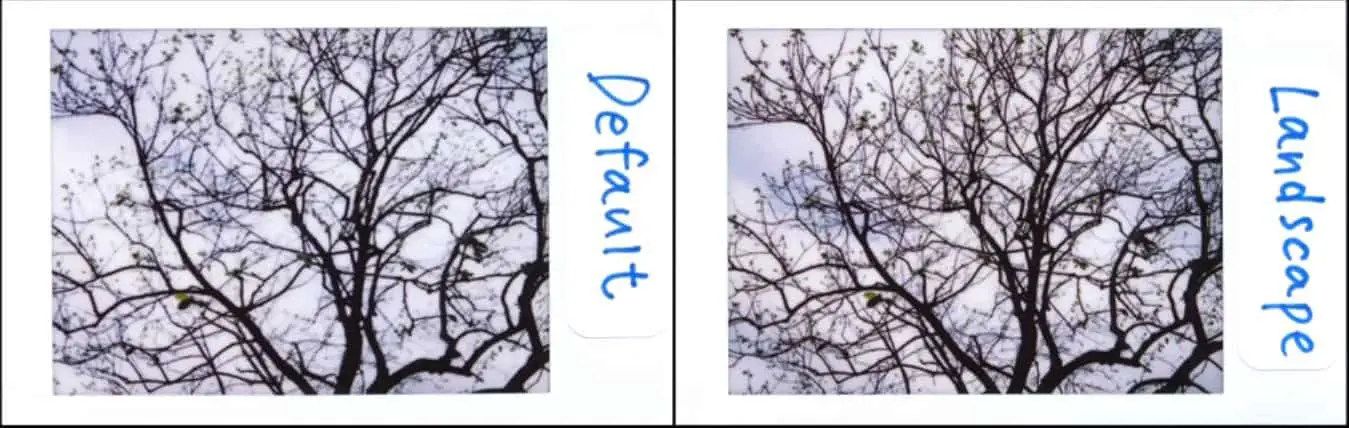
Default vs Landscape Mode tree
Test 2
OK, starting with the second example, here in the picture you can see of a store front. Same technique has been used for this pictures. One is default mode and another is landscape mode. The cameras was set far away from store more than 3 meter obviously.
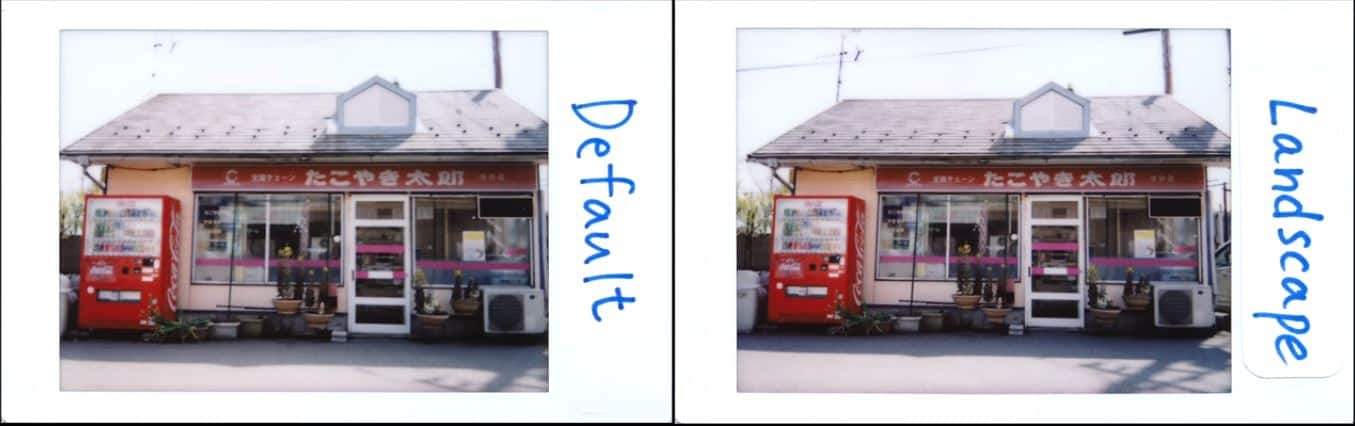
Default vs Landscape Mode store
In the default mode, the title of the store hard to understand. The left side cable with bar almost disappear and the shadow also is not clear. Even the roof is also faded. The result is blurred for distance photo.
In the landscape mode, the right side picture, you can see the better output than the default. You can read the title and see clearly through blind eye. The feature has got the cable and bar also and roof is also looking nice. The roof is not faded by extra light. The landscape mode has done its job almost perfectly.
Test 3
Now at the third example. Most of the people or neighbor or you have garden in the yard. The garden has beautiful flower with nice leaf. Suppose you want to take picture of your garden with home. And you want to get the all background view using this mini 90 camera. If you don’t wanna use macro mode for closer shot only for flower picture, then you can use landscape mode to get clear composition.
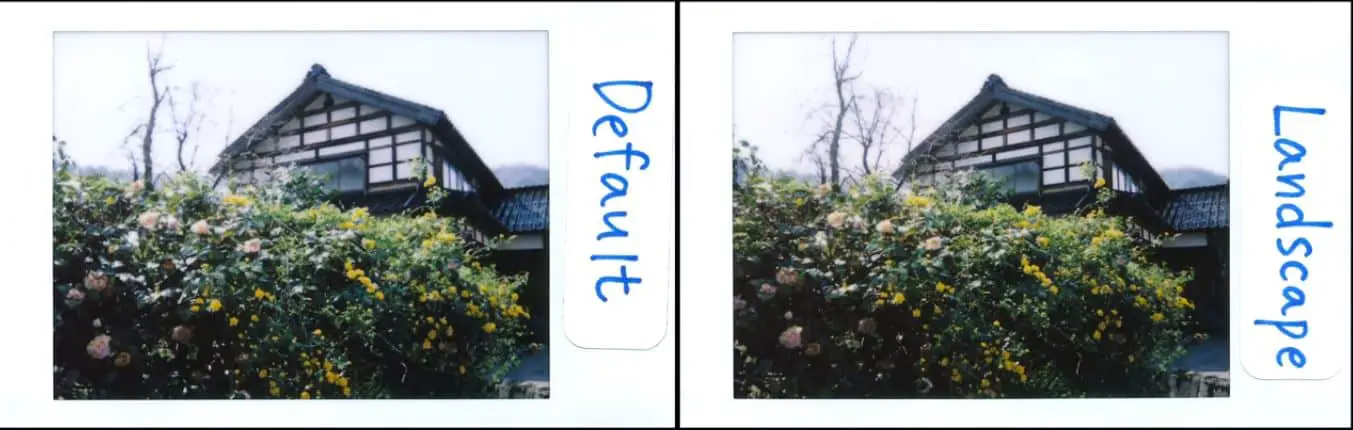
garden with home- landscape mode
In the default mode, you can see the picture is pretty much clear. The flower is looking great even the moe is clear. But there have something missing in the picture. The background tree is not clear and the little portion of the flower and leaf are missing. Since this the color photo, you can not see most of the lacking of the output.
In the landscape mode, this is the almost same output but I am going to explain the different. At first you can not understand the different. But after having taken photo with landscape mode you can see different between them.
The first different is the brick. Yes, at first see on the default picture. On this picture, right bottom of the flower tree, you will see the brick is almost blurred. Tin Shed of the home is also look blurred. But in the landscape mode, everything is alright even the flower and tree is captured perfectly.
Test 4
In the test 4, you can see there are lot of pick flower in the garden. The camera was actually set 3 meter less. So the front flower is looking blurred. So now you will believe that the distance is important. Since there is too much flower populated, so the camera could not captured all the flower. But in this case, you can use macro mode to get better shot. If you want to get better photo like this situation, you should get yourself right position for best shot.
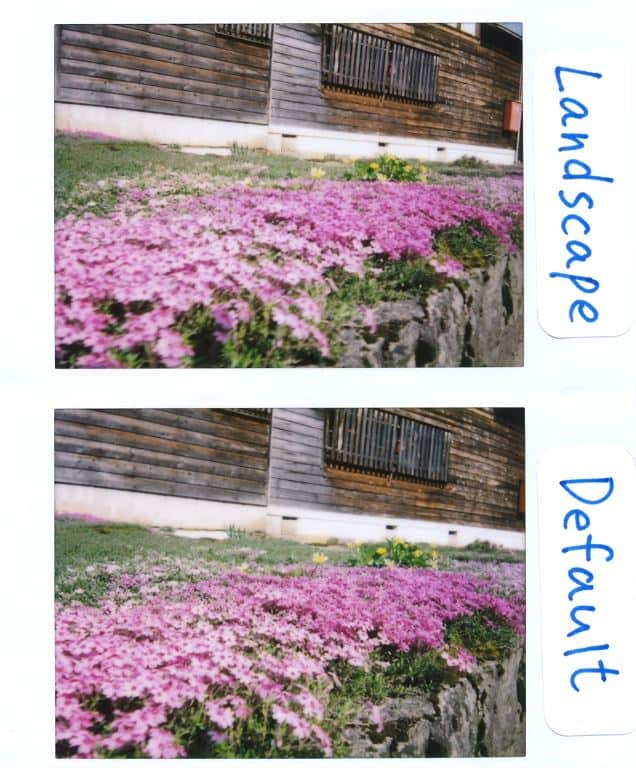
Lots of flower-Landscape mode
Test 5
Here is the interesting one. According to the rules, distance from the picture to camera more than 3 meter. That’s mean you can get best example of default vs landscape mode. You also can see the difference between sky as well as cloud.
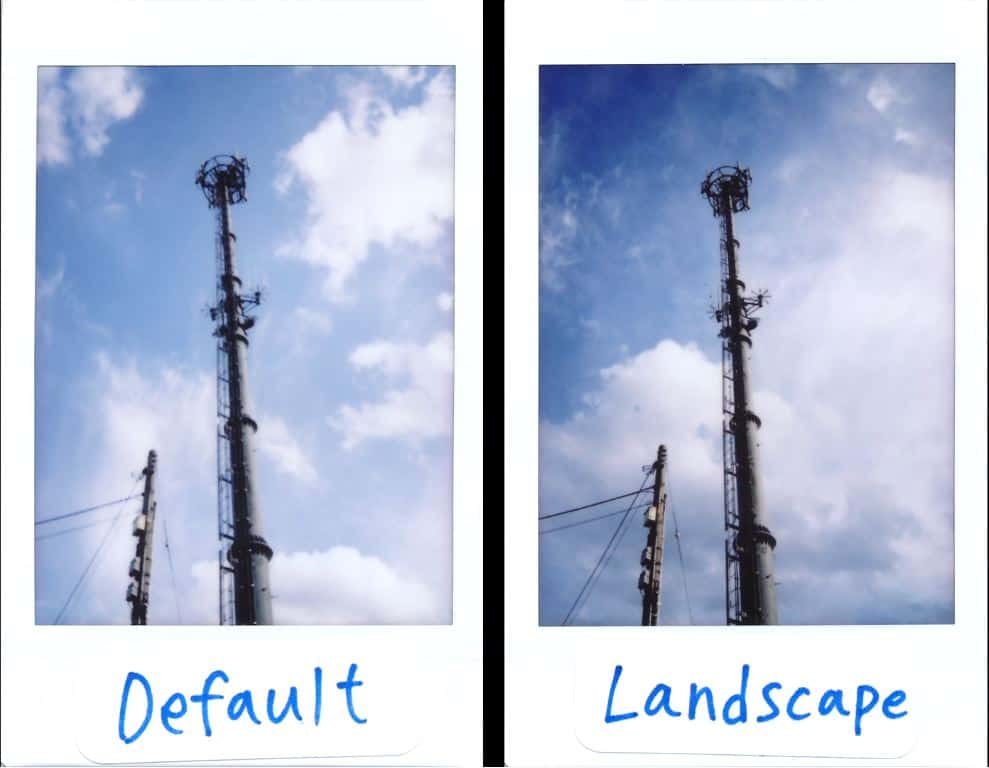
Default vs Landscape Mode Sky
At first, in the default mode, the poll is literally blurred and the cable is almost disappeared. Poll and cable is turned into little white far from actual shape or color. And if you look at the sky, you will notice that sky and cloud did not get true blue and white colors.
In the landscape mode, the picture has slide up perfectly and look great. First, the poll is not blurred like default mode and the cable is not disappeared and it can watch with blind eye. The sky gets perfect blue color as it was while taking picture. The cloud also is mixing up with the sky and looks perfect.
Click here……….Top tips & Tricks of Instax mini 90 Neo Classic
Click Here.……7 Tips and Tricks of Macro Mode You Might don’t know of it.
Click Here……… to Get More Details Use of Light Dark and how to use them with all mode
Click Here ………….to know If you want to avoid blurred photo, then
Click here………….. Why You are about to love this New Kids Mode
Click Here……….. to Get More Details Crazy to Use of Double Exposure Mode
Click Here.……… to Get More Details the 10 Magic trick Using of Bulb Mode
Click here……….Understanding 5 shooting Modes Mini 90 | Advanced Guide


0 Comments