When you buy any camera, you always also want to take closer shot image with it or Selfie. So you that’s why Instax sq6 comes with Macro Mode. What this feature is going to do is that it takes closer shot for you, Just selecting Macro Mode. If you have sq6 camera and you want be more familiar with it, then you are in right place. You can see me here to discuss about macro mode from Basic to little Advance of Macro Mode. This feature only design for Closer Shot or sometimes for Selfie.
At first, you should know Macro Mode does closer shot so that you get more clear shot image for you. That’s why this feature is awesome. The amazing auto function of this camera helps you to get more high quality picture while taking closer shot with macro-mode. Since it has separate mode for selfie, you won’t need to use macro mode for taking selfie. So let’s take a look of this feature from beginning.
How to Use Macro Mode ?
When you turn the camera on, you can select the macro mode by pressing the mode button or using camera dial. If you want to select with button, then press the Mode Button two or three times based on the yellow light after starting the camera. Or if the little light at the selfie mode, then press once to go macro mode. It is assigned with flower to recognize.

Macro Mode
Hints for parallax or Closest Shooting
In the macro mode it’s prior distance is 30 centimeters to 50 centimeters. There is an issue if you want more closer shot with sq6. Keep in mind when you do macro shots, you should have parallax in mind.
How to shoot parallax?
Select 30-50 centimeters object if possible or more closer. Hold the camera to the object and take the “O” point in the viewfinder on the upper right of the center of the object or subject. Then take the photo.
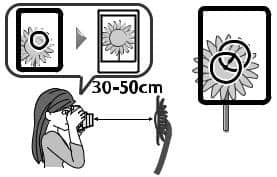
Macro Mode Parallax
Why should you use parallax ?
What’s the interesting matter of macro mode is that, it will get you take shot as close as you want. But while taking shot closer, you have to learn a simple think of focussing circle or point. That’s going to help you get the right focus. Since it lets you focus in closer on a smaller object and make it a bigger part of your frame which is really nice.
When you are shooting far away it doesn’t matter. But for much closer shot, you should be aware of parallax.
Tip:- One thing you keep in mind when you use macro mode for really more closer shot, just be aware of parallax. You can see the viewfinder is at right top of the camera but lens is at the middle point of the camera. When you are taking really close to the object and thinking that you are framing object to the middle point through viewfinder, then you are wrong. If you go a little bit down to the left, it helps the perfect centre point on the film.
Here is the more closer shot of Macro mode. This picture of flower is taken more closer shot. What it is done is that the camera focus a little bit down to the left that helped to get center point to the lens. And the output is that the film gets center point of the flower. As the composition is best for the closer shot with sq6, the shot output is really look great.
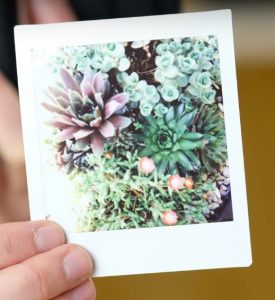
Closest shot with Macro mode
I found that when you take too close shot with sq6, the output is pretty cool. Make sure you make distance far enough away from object for normal distance photography.
Why you should use Macro Mode ?
The instax square sq6 can capture best and beautiful images in the normal mode, But if you want image according to your choice then you need to change the feature or mode as your demand. Say, you macro mode can give you more closer shot as like as you want in sq6 better than previous instax line. Just keep in mind if you want shot of short distance away for attractive result, the common feature is macro mode you gotta use for every closer shot. As a output, you will get better close-up and qualityful photo.
On the other instax camera like mini 90 or mini 9, if your subject is at shorter distance than the minimum focusing distance from the lens, it might be out of focus or get blurred result. But the sq6 camera can get closest photo of object as you want. This is interesting and new in sq6 macro mode feature.
In the normal mode, you will get picture like below. When you shoot picture for closer output in normal mode, it will look you still taking photo from distance. Eventually you don’t get the closer shot as you want. You can the difference between the normal mode and macro mode.
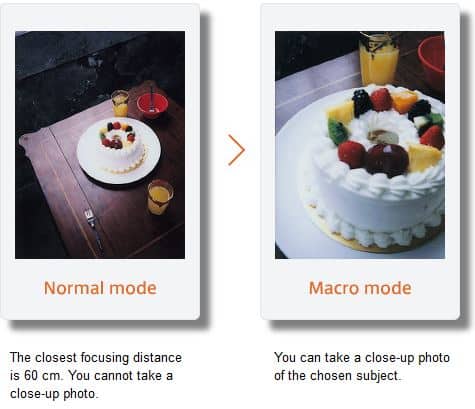
Normal VS Macro Mode
Although these images are taken from instax mini 90, but you can see the actual difference of the normal and macro mode. Both pictures are good but not as you want. If you want to take more closer shot then use the macro feature to capture the shot.
What distance is perfect for macro mode ?
The minimum focusing distance in the macro-mode eis 30 cm to 50 cm. This range will help you to get sharpest images. You should take shot within this range to get perfect control of capturing. You can get more closest shot with sq6 camera. But you should aware of parallax situation that I have discussed before on this article.
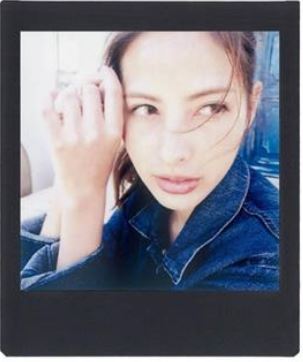
Macro Mode Ideal Distance sq6
First Example, Here you can see the perfect example shots of Macro mode. The girl image get the sharpest quality and looks awesome. It has shot between the 30 to 50 cm range. As this camera is update from all feature new, fuji has improved quality especially on all modes.
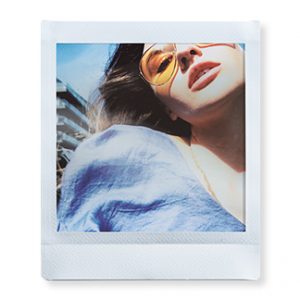
Macro Mode Ideal Distance sq6
Second Example, Here is another girl picture taken from sq6 and use macro mode. The shot has been taken way closer and this look like amazing also. You can see that it has got sharpest quality also and composition is also good. Due to the closest shot, the parallax did not match so that the shot get some cut. But the camera holder has done it on his own will.
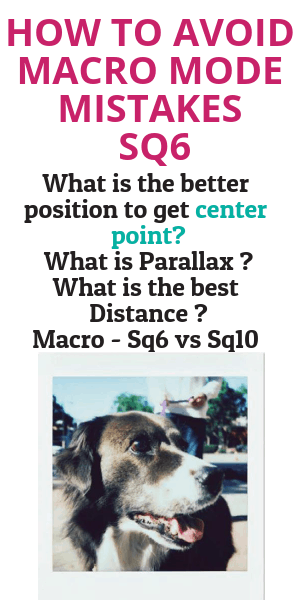
Another Example, you can see a dog photo which is taken using macro mode also. I think this was perfect timing for taking shot. The picture get centered while taking shot. It is more memorable scene of my other shot. I think now you got my point of using the macro mode function to get closer shot. As this camera can get closer shot as close as you want, so this is much more fun with the instax photography.

Macro Mode Ideal Distance sq6
Distance doesn’t matter if you get expert using macro-mode function. Since the camera will help you get the best shot, you just need to be careful to take shot.
Why distance is important for sq6 ? It might possible that question comes to your mind and you think “Oh this is very hard”. But really it is not. Even it is easiest feature on instax line camera. You just need some instruction so that you don’t waste your valuable film. Because every film is important when you get into instax or polaroid photography.
So that’s why you need to educate yourself a little bit more of it. Eventually, you will enjoy the journey to capture the memory with square film. Another benefit of learning about distance is that expertise of distance shot. When you learn the ideal distance of 30 to 50 cm, you will not only expert in all instax camera but also digital camera. Because every camera has almost same feature if the topic is photography. It is also same for the instax-mode.

Normal VS Macro Mode Shot
Now you can see the actual output you will get after you take a shot with macro mode. I believe you get the main idea the difference between normal and macro mode.
Why Viewfinder is the special feature for Macro mode???
I have also been talking about in this article one really cool thing is the automatic-feature of the sq6 and that is the ViewFinder. What the viewfinder is going to do ? When you put macro mode on, the viewfinder actually changes the dial a bit automatically.
You can take closer shot as you want using the viewfinder using parallax. You can not find this feature on the other instax camera. Just aim it and take the shot. take the “O” point in the viewfinder on the upper right of the center of the object or subject. Then take the photo.
It’s a combination feature of viewfinder and your parallax skill. Together it perform better for taking closer shot. When you understand the theory of shooting closer picture, you will get best closer and sharpest shot with macro mode.
Taking Macro Shoot Without Using the Flash Suppression
Normally the flash button here is actually to force the camera not to use a flash. So when you take a shot the flash should not fire but you make sure it off. How you are going to do is that press the flash suppression button on so that the flash don’t fire while taking shot using macro mode. You will see a light up that’s mean that the flash is not going to fire off.
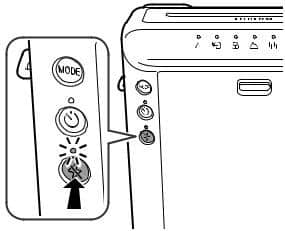
Taking Pictures without Using the Flash (Flash Suppressing)
How to do that?
- Press the flash suppressing button as like as the picture.
- The LED on the button will light up and press the shutter button won’t let the flash fire until you manually turn off.
- Flash button is not turning off even automatically so you need the press the flash suppressing button again to turn off.
- Remember that based on the situation, the picture may look bluish-green, reddish or darker or lighter than expected.
So when you press flash suppressing button, this will word with this feature. It will stop auto flash so that you can use it as you don’t need the flashlight for closer shot. Lot of people comes with that issue talking about autoflash problems with the instax camera. Select this where the flash is prohibited or you need the turn off the flash for macro mode or in a bright place. Always remember that if you don’t press it back, it will stay off as you go and take pictures. So disable that you need it.
Should You use self-timer Mode with Macro ???
You should not use self-timer mode with macro mode. It is special feature for taking group shot or landscape mode. Sometime you want to take group shot, then you should use self-timer mode and it’s work awesome. Landscape mode is also perfect for using self-timer mode. If you want to take shot of movement subject or object closer shot like dragonfly or butterfly, then you might use self-timer with macro mode. But that time you must try to use tripod so that you picture don’t get blurred.
So if you have decide to take shot of movement subject using tripod, then press the self-timer to start. When you press on it, the little LED is going to light up and then in the front light is going to open up and then it’s going to stay open for seven seconds ( 7 s ). The three remaining seconds it’s going to be blinking letting you know that in three seconds the picture is actually going to be shot.
So that is really cool in the front up there to let you know when to actually force you tripod stay still to get exact shot. Tips for using self timer is that if you think you don’t want to use it, just press the self timer again. It will stop the shot.
Major Difference between Sq6 VS Sq10 Macro mode
Here you can see on the picture below, there is a flower garden. This garden flower picture shot has taken both sq6 and sq10 at the same time. To get the perfect shot it have used tripod to get still picture. After having captured, you will see the output. Although I don’t know the flower name. The flowers looks very nice and gorgeous.
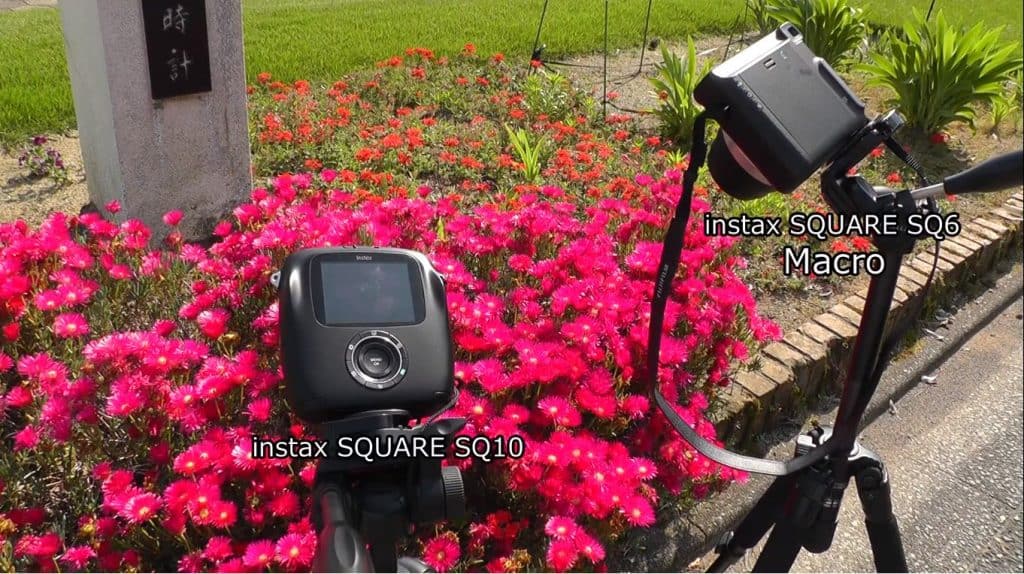
sq6 & sq10
Here you can see in the result is that the actual different of the two camera sq6 and sq10. I am going to agree with the sq6. Why ? because it’s much better quality than the sq10 picture.
First, at the sq6, the flower got the natural pixel and composition on the instant film. Since sq6 has the flash-suppressing option, you can turn off the flash. The picture output also get better even if you turn on the flash.
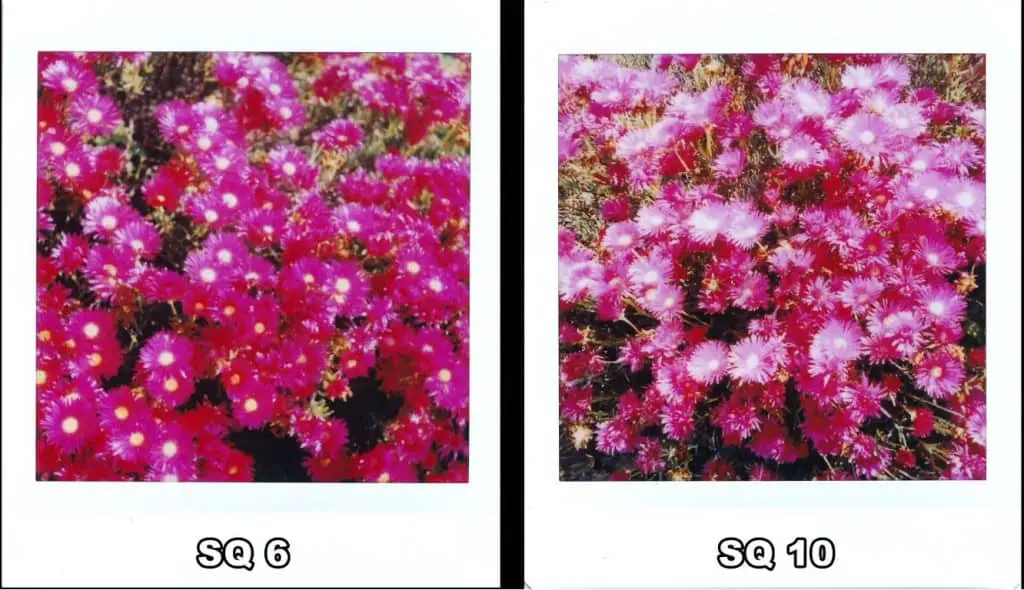
Different shoot of sq6 vs sq10
Second, in case of sq10, the output is also better but has got more reflection of light. That’s why it’s got more light on the film. The picture is not as clear as the sq6 film. The final decision is that the sq6 is way better result than the sq10.
Here you can already imagine the different of the quality. The overall output is great for sq6. The main different is only the quality between them. And obviously the square sq6 has updated the pixel feature for better quality.
How to use 3 flash color filters for Macro Mode
The 3 flash color filters is special feature of Instax sq6. You will get awesome and funny picture by using the gels. If you have the camera, you already know about the 3 flash color filters of sq6. They are Orange, Purple, and Green. You can get amazing output If you use flash filters with macro mode.
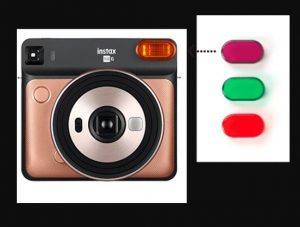
3 flash gels macro mode sq6
What you need to do ??? Just use the gels whatever color you want to use before taking shot for macro mode. Say, you want orange in red in your picture. Just put the orange gels on the flash and get result. You can play with cool result of using 3 flash gels. So enjoy the colorful photography with instax sq6.
Click here……….Top tips & Tricks | Instax Square Sq6 shooting.
Click here……….Go to details of Double Exposure Mode
Click here……….. to get Step by step Guide of Instax Sq6 Instant Camera.
Click here………..Go to details of How to Use Landscape Mode in Different Situation

0 Comments