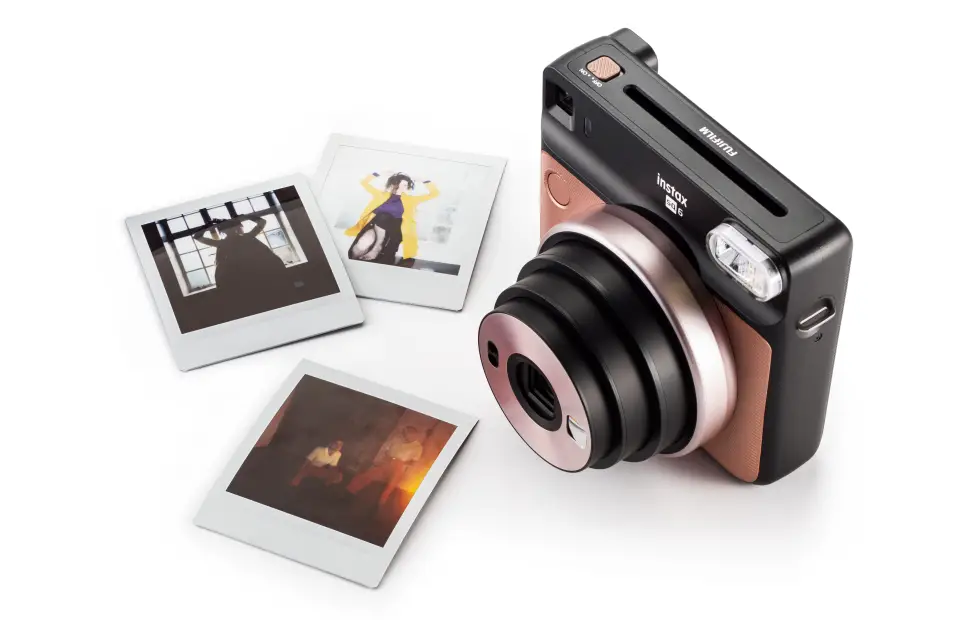
Fujifilm announce a new square camera named Instax Square SQ6 which is brand new of instant camera field. It’s look like exactly the Instagram logo. The SQ6 shoots instant Square film which and comes with awesome features. SQ6 is first analog camera and it shoots wide square film.
Variety of features with greatest creativity
With auto exposure control along with the high performance flash comes with auto calculation which can calculate the surrounding brightness. It can adjust the shutter speed to capture both the subject and background with huge clarity, even when shooting in low light conditions, for example indoors or at any event like party.
It has also other special feature like selfie mirror, self timer, selfie mode, build in timer and tripod socket located at the bottom of the camera.
Three Unique Modes to capture any moment
Instax Square SQ6 comes with 3 special modes to capture the memory and moment which is double exposure mode, Macro Mode and Landscape Mode. I will talk about that in this article in details.
Click here to read Top Tips and tricks of Instax Sq6 instant camera.
INSTAX SQUARE SQ6 KEY FEATURES IN SHORTS:
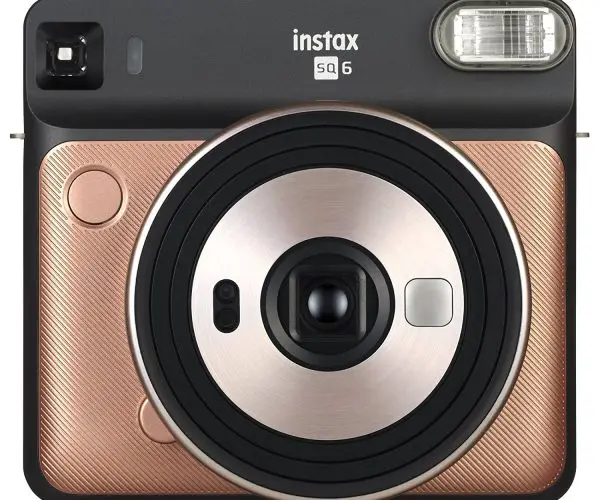
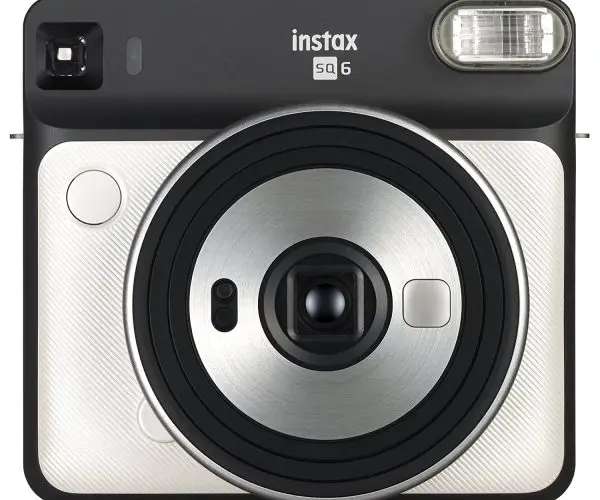
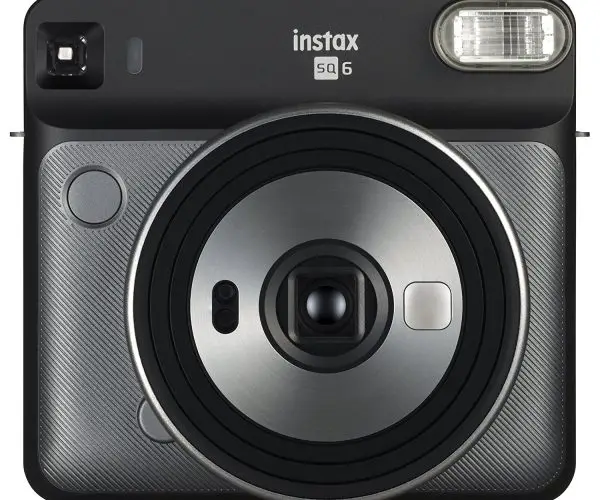
- First, it comes with three colors,Pearl White, Blush Gold and Graphite Gray.
- three captare modes, these are Double exposure mode, macro mode, landscape mode.
- Controlled self-timer approximately 10 second delay with 3 seconds blinking alert.
- LED display with shooting mode ( auto exposure,Selfie, macro, landscape, double exposure),Brightness adjustment, self timer mode, flash control.
- Tripod socket (we have to buy tripod separatly)
today we are going to take a look at the brand new sq6 camera from Fujifilm that takes Instax square format films.so if you want to know more about this camera and see what’s in the box keep on rolling.alright so let’s take a look at what’s in this box when you get this.
INSTAX SQUARE SQ6 COLORS
so as you see, there’s three different colors you have the Graphite gray you have a Pearl white one and you have another one which is a Blush gold.
What will you get in The Box after buying SQ6?
so opening up the box you will get a little sheet that shows you how to properly unbox the camera. Also, you have a little caution notice for the film itself and you have this user guide here which is somewhat big but don’t worry this is in multiple languages so you won’t have to read this whole thing. it’s actually really quick to get through it.
looking inside the box, you have batteries, so we’re gonna take them off. you have your neck strap here which I strongly recommend that you use it. because you don’t want to drop your brand-new camera. I’m gonna show you how to actually put it on the camera.
you have this little part in the box that comes out and you will get three little gels.so if you want to create nice effects you can just put this on the flash and then it’s gonna give you a tint on your images.
then we get to the good crazy stuff which is the camera. so just gonna put this box away and remove the camera from little bubble wrap and then you can see the sq6 and what I ordered is Blush gold.
How to use INSTAX SQUARE SQ6
Before you read this, If you know how to set up the Camera, then you can skip this to the features and function paragraph.
Batteries
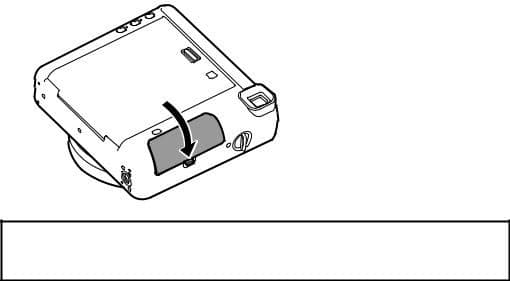
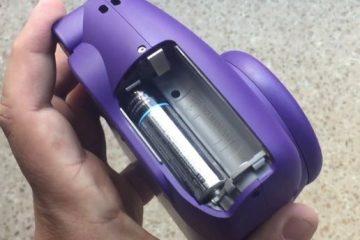
so first of all, we’re going to put in the batteries so you just open up that battery door. then a little tip you put the first battery to the back and then you put the second one in the front that way it’s easier to to get it in then I’m just gonna put back the little door and then we have some batteries in there.
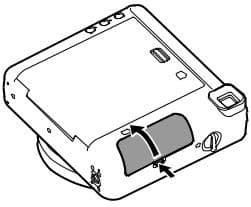
Open the battery lid
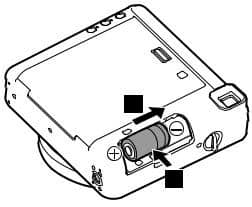
Instax Square SQ6 battery 1
Insert one CR2 lithium battery straight (1) matching the C and D polarities and slide it to the end (2).
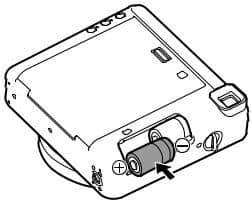
Then, insert the other battery.
Instax Square SQ6 battery 2
Instax Square SQ6 battery 3
Align the tabs on the battery cover and push the battery cover lock until it clicks into place.
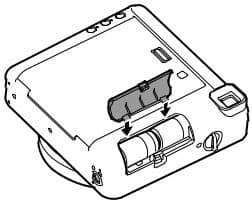
Instax Square SQ6 battery 4
To remove the batteries, remove one battery first, and then slide the other battery and take it out.
Caution
Use two new CR2 lithium batteries. (All the batteries should be new and be the same brand/type.)
Insert the batteries before you load the instax SQUARE film pack.
The battery performance may be reduced when it is cold. In this case, warm up the batteries to room temperature before using this camera.
Film
Then It’s time to put in some film. so you want to actually align the yellow with the yellow. then next up you want to power on the camera and then take a shot so that it will eject the dark slide.
Press the back cover lock down to open the back cover
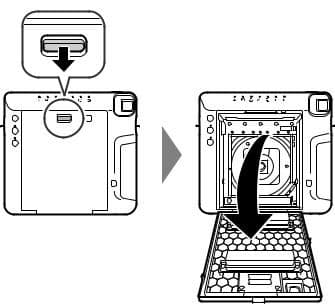
Loading the instax SQUARE Film Pack 1
Hold both sides of the film pack, align the yellow marks on the camera and the film pack, then insert it straight.
Loading the instax SQUARE Film Pack 2
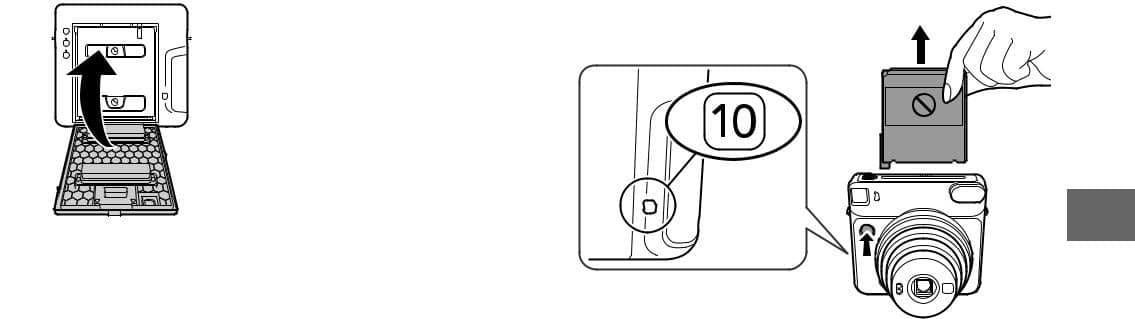
Close the back cover. Make sure the back cover lock clicks into place. Press the shutter button. The film cover (black) is ejected and “10” is displayed on the film counter on the back of the camera. Carefully remove the film cover.
Loading the instax SQUARE Film Pack 3
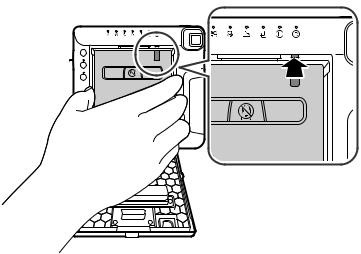
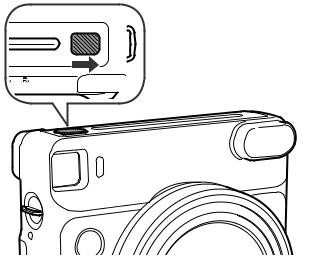
Slide the power switch toward the “ON” side to turn the camera on. Do not hold the lens cover when you are turning the camera on; otherwise, the lens cover will not open.
Loading the instax SQUARE Film Pack 4
now you can see on the back little window you have your number of exposure that’s remaining. so as you can see 10 exposure left because you didn’t use one yet. it’s just gonna decrease from there and then tell me how many pictures I have left.
Caution
Do not open the back cover until you have used up the film; otherwise, the rest of the film will become exposed and turn white. The film can no longer be used.
When you load the film pack, never press the two rectangular holes on the back of the film pack.
Never use a film pack beyond its shelf life; otherwise, it may damage the camera.
Use FUJIFILM Instant Film “instax SQUARE” only. The instax mini film or instax WIDE film cannot be used.
Notes on the film pack
Each FUJIFILM Instant Film “instax SQUARE” pack contains 1 black film protective cover and 10 film sheets.
Do not remove the film pack from its inner bag before loading it into the camera.
For details, refer to the instructions and warnings on FUJIFILM Instant Film “instax SQUARE”.
Quick Review – Instax Square SQ6
so a little quick tour of the camera. you have the flash, you have your shutter button, you have mirror to frame yourself when you want to do selfies, you have light meter so this needs to be always exposed to light because that’s actually what’s measuring the light for you.
you have your LED that’s going to light up whenever you put on the self-timer, you have the viewfinder.
you have these strap locks on the each side to put your strap which I again strongly recommend you put on because you don’t want to drop your on camera.
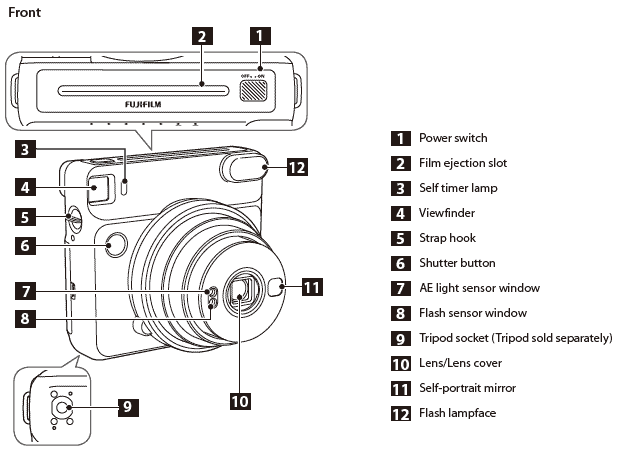
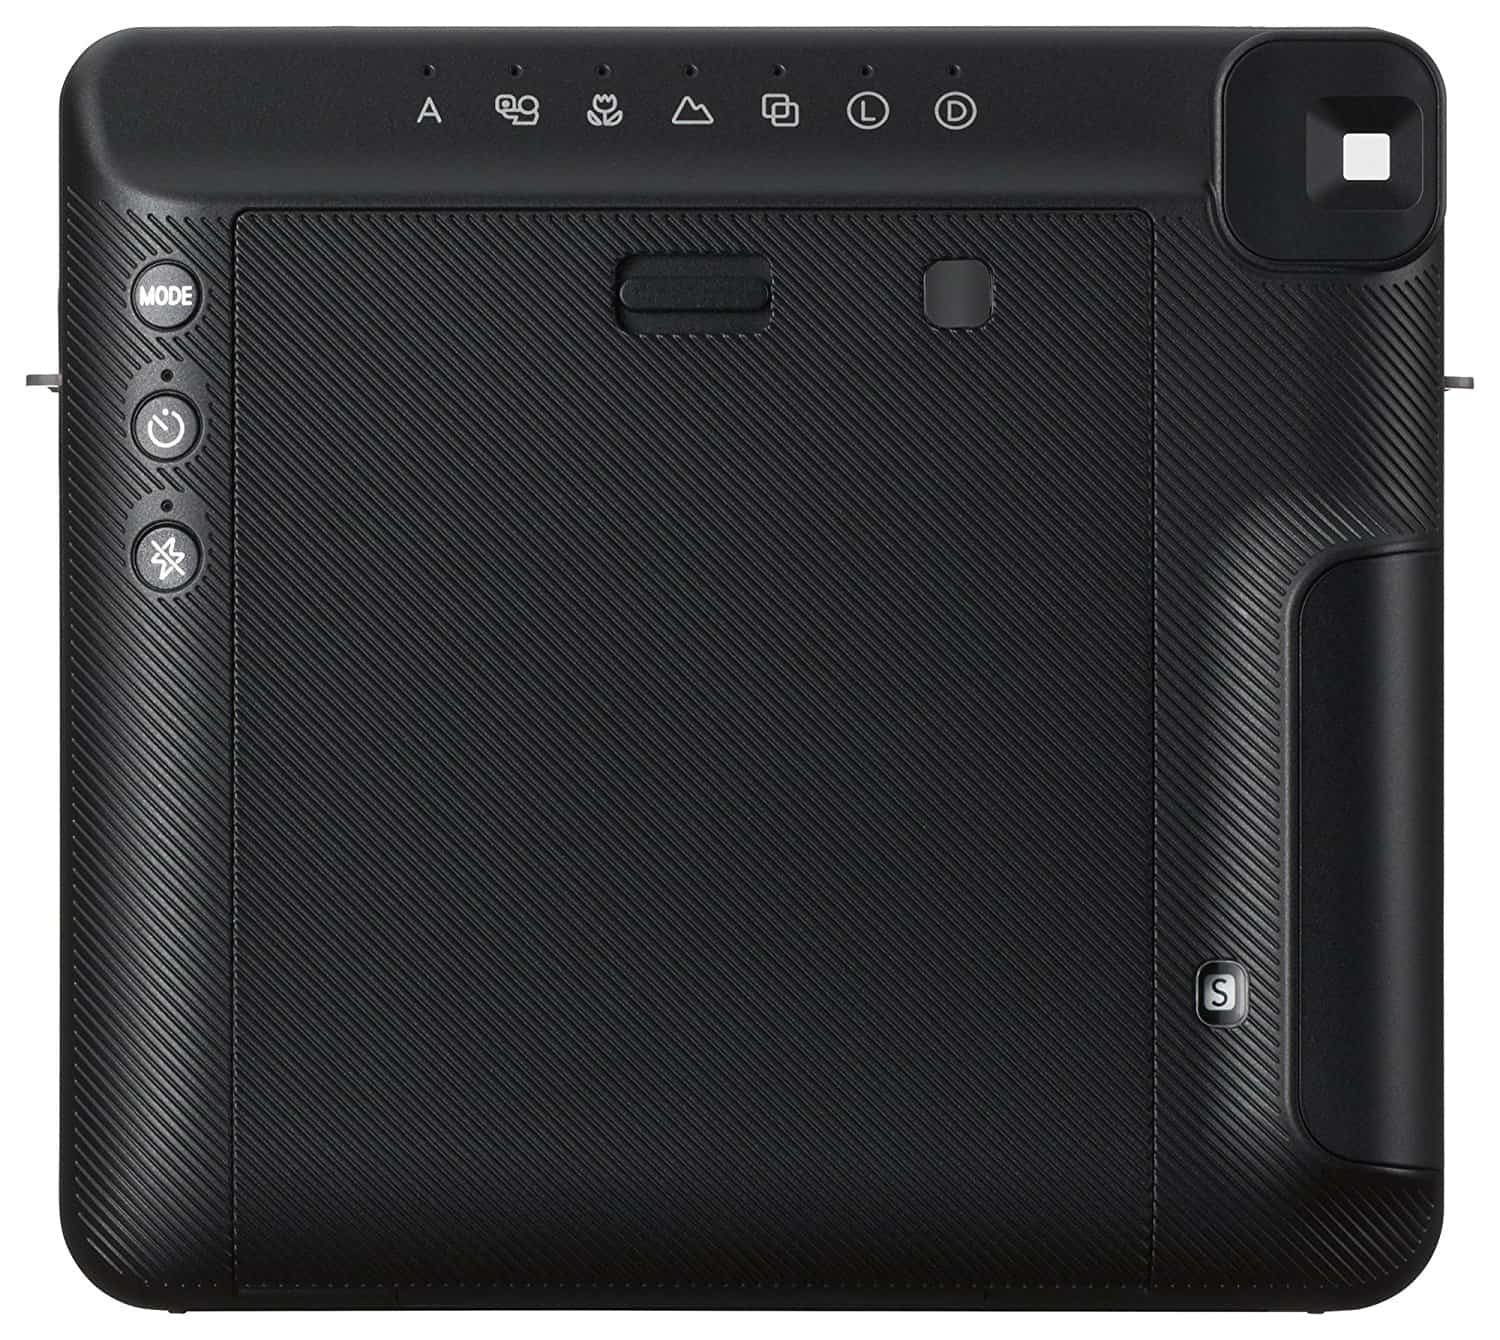
Instax Square SQ6 Front
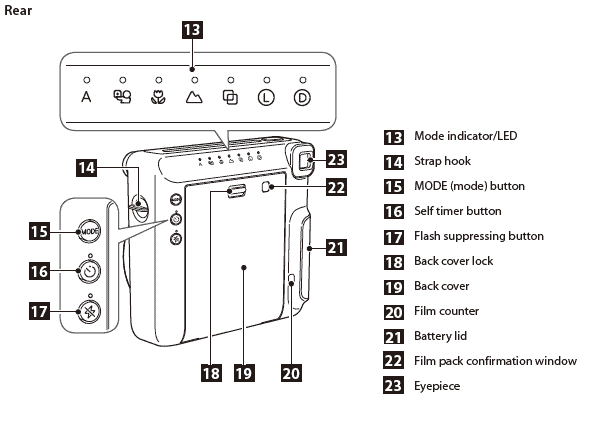
Instax Square SQ6 Back
Attaching the Strap
To put it on it’s actually really simple. so just take it out of this little bag and then you just want to loop it. it’s secured now so do the same thing for the next one.
Attach the provided camera strap to the strap hook on each side as in the illustrations below.
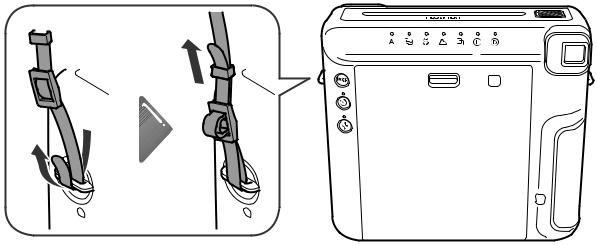
Attaching the Strap SQ6 1

Attaching the Strap SQ6 2
Caution
• For safety, use the strap only as a shoulder strap. Do not put the strap around your neck.
• Be careful so that the strap does not obstruct the film ejection slot.
all right so now the strap is on we can move forward underneath the camera you have this little tripod mount right here which is really cool. if you want to take landscape shots for example or if you want to use the self-timer to take a group photo so you can just put it on the tripod put on the self-timer and get into the shot as well.
Taking Pictures with Various Shooting Modes – Instax Square SQ6
so we’re going to go through the different buttons in the back of the camera so there’s three of them.you have your mode button, self-timer, and Flash button which literally means no flash.
Instax Square SQ6 Modes
Taking Pictures without Using the Flash (Flash Suppressing)
Starting with the bottom of these button, the flash button here is actually to force the camera not to use a flash. so if you know that you don’t want the camera to fire the flash you want to force it not to go off then you just press on this button. then you see a little LED is going to light up. that means that the flash is not going to fire off.
Select this where using the flash is prohibited or when you want to shoot without the flash in a bright place.
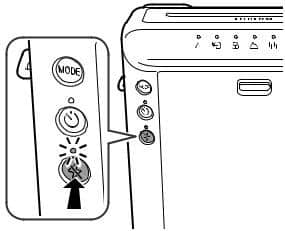
Flash Suppressing Instax square sq 6
Press the flash suppressing button.
The LED on the button will light up and pressing the shutter button will not let the flash fire.
Flash suppressing is retained even after pressing the shutter button. To cancel, press the flash suppressing button.
• Depending on the lighting conditions, the picture may look bluish-green, reddish, or darker or lighter than expected.
• We recommend you use a tripod when it is dark.
and if you don’t push it back it will stay off as you go and take pictures so to disable that you actually need to push it again. that way it comes back to automatic.
Self-timer
the next button is the self timer button. so this is actually really useful like I said. when you want to take group shots or if you want to shoot landscape for example on a tripod and you don’t want the camera to move.
so when you press on it. the little LED is going to light up and then in the front light is going to open up and then it’s going to stay open for seven seconds. then the three remaining seconds it’s going to be blinking letting you know that in three seconds the picture is actually going to be shot. so this is really cool in the front up there to let you know when to actually force your eyes to stay open.
Selecting a Shooting Mode
The last button is actually your mode button. so you are going to use this button whenever you want to switch from the different modes up top back of the Instax Square SQ6 Camera.
Each time you press the MODE button, the shooting mode changes as follows.
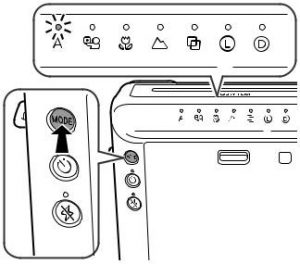
Selecting a Shooting Mode 1
Selecting a Shooting Mode 2
Selecting a Shooting Mode 3
• Taking a photo does not change the settings.
• Turning the power off returns to Auto.
• In a dark place, the slow shutter may automatically be used. Hold the camera securely to prevent camera shake.
• The background may look bluish-green or reddish depending on the lighting condition.
Automatic Exposure Control
so the first one A is actually automatic. so it’s really just a point-and-shoot you just go you take a picture and then that’s it. it’s going to do everything for you.

Automatic Exposure Control
Select for normal photography.
• As the flash fires with slow shutter (slow synchro) in a dark place, the background is photographed brightly.
Selfie Mode & Selfie Mirror
if you move on to the next mode is actually the selfie mode. When you press for selfie mode, you will see the lens moved, so this is actually adjusting focus. because it’s actually going to be somewhat of a close-up shot.
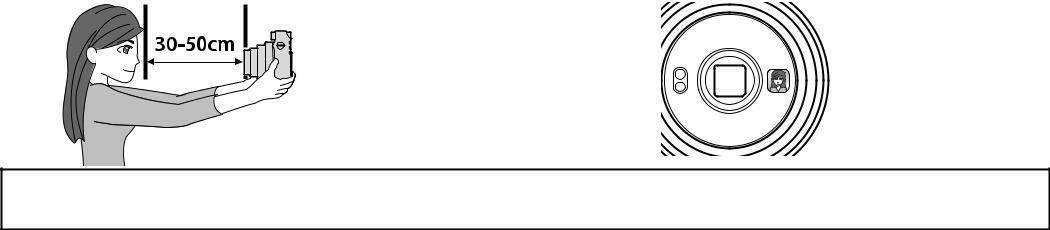
so whenever you’re on the selfie mode, you need to have the camera within 30 to 50 centimeters to be in focus. so if I take a picture using this little mirror, then you can see the image fully processed in them back magically.

Selfie Mode & Selfie Mirror
You can take a self portrait using the self portrait mirror. Using this mode applies an appropriate brightness and shooting distance for self portrait.
First, Hold the camera securely keeping 30 cm to 50 cm between you and the edge of the lens. Hold the camera securely especially in a dark place, to prevent blurring.
Then, Confirm the composition using the self-portrait mirror, then take a photo.
Selfie Mode & Selfie Mirror
• When you take a photo, do not look at the flash; otherwise, an afterglow may interfere with your view temporarily.
• If you press the shutter button while the flash is charging, the shutter release will not trip.
Macro Mode

Macro Mode
next up is going to be your macro mode so again it’s 30 centimeters to 50 centimeters. if you want to take close-up shots but one thing to keep in mind when you do macro shots is that you have a parallax.
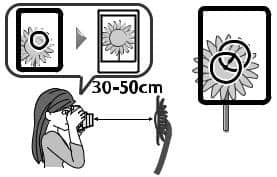
Select when shooting a subject at close range (30-50 cm). Hold the camera so that the “O” mark in the viewfinder is on the upper right of the center of the subject (see the illustration above), then take a photo.
Go to details of Macro Mode Tips And Tricks
Landscape Mode

Landscape Mode
next up is the little mountain icon there this is actually from two meters to infinity. so it adjust the focus for that so whenever you shoot something that’s far away you want to put it in this mode to make sure everything is in focus.
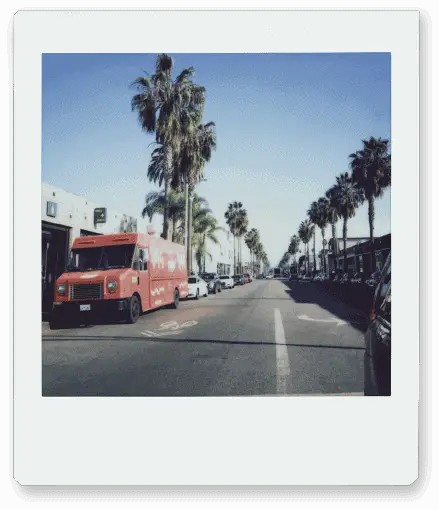
Landscape Mode
Select when shooting a distant subject (2 m~∞).
Go to details of How to Use Landscape Mode in Different Situation
Double Exposure Mode

Double Exposure Mode
the next mode is actually really cool this is Double exposures. so it’s going to allow you to take two pictures. so when you press the shutter button, it won’t eject the film. it will let you shoot out of the picture.
so that can give you a lot to play. So when you take the first picture, you can see the picture is not coming out and low LED will be blinking on top. so You need to take the second picture. then you see it will ejects the picture and you can see magically appearing in the back.
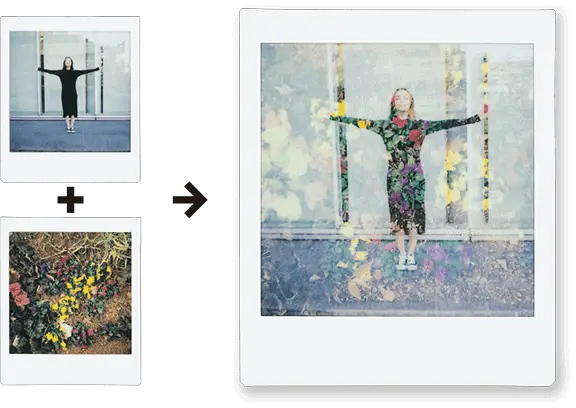
Double Exposure images – Instax SQ6
2 subjects are photographed in one picture. When you shoot the first subject, the LED on will flash.
After that, shoot the second.
Go to details of Tips and Tricks of Double Exposure Mode
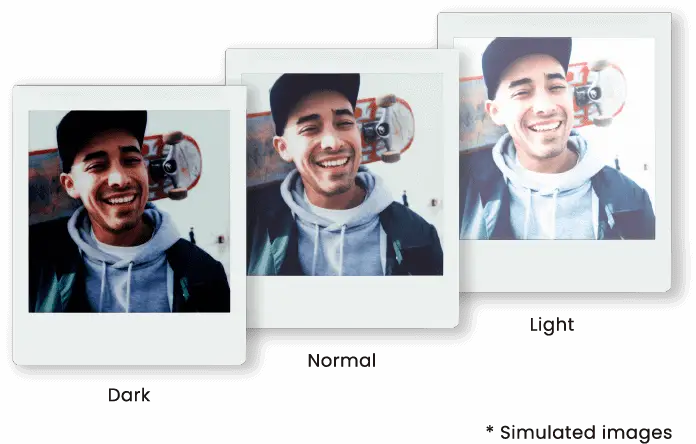
Lighten & Darken Modes

Lighten Mode
Once again so the next mode would be lighter. so if you want your image to be somewhat brighter than what it should be. you would put it to lighter so it will give you an somewhat overexposed image.
another way you can use this mode is actually when you’re using these little filters here. Because when you put it in front of the flash, it actually diffuse the the flash itself and gives it less power. so you want that your image should be a little bit overexposed.
so talking about these gels, for getting different colors of output, you just take it and you just pop it on to your flash. Select to lighten the picture if photos are coming out too dark.
Darken Mode
the last mode is actually darken. so the same principle, rather than having the correct or perfect exposure it’s gonna bring it down a little bit. so if you want to get somewhat of a darker looking image low-key image or you know that the scene is just too bright. then you can put it to darken that way your image is going to be a little bit underexposed.Select to darken the picture if photos are coming out too bright.
Here is the difference among darken, lighten and normal modes.
So, alright so that’s it for getting started on the brand new FujiFilm Instax sq6 camera. I hope you got a little more info from this article. if you’d like to know more about Fuji film products or Instax Camera, then read more article on this blog. Hope you will enjoy the Instax Square SQ6 camera on real life.
Click here……….Top tips & Tricks | Instax Square Sq6 shooting.
Click here……….Go to details of Double Exposure Mode
Click here…………Go to details of Macro Mode Tips And Tricks
Click here………..Go to details of How to Use Landscape Mode in Different Situation


0 Comments